How to Change Your Stripe Password and Manage Account Access
Step-by-step guide on how to change your Stripe password and manage account access securely and efficiently.

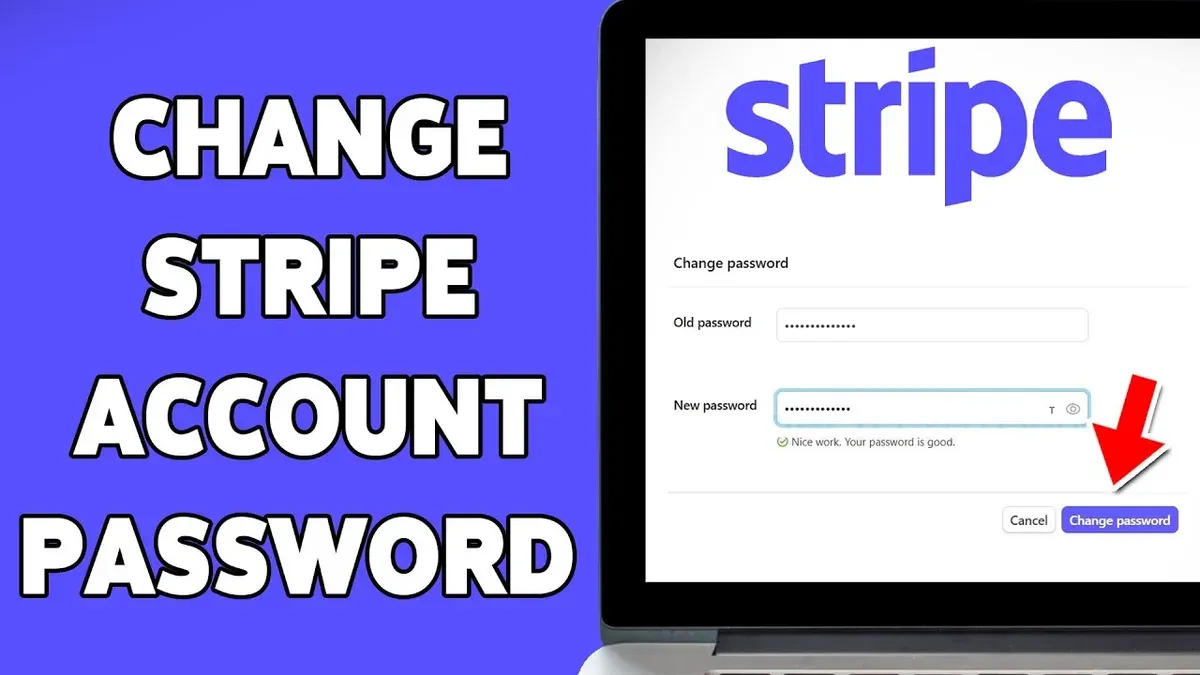
This article provides clear, step-by-step instructions on how to change Stripe password and manage account access effectively. It covers essential prerequisites, exact menu paths, and common pitfalls to avoid when updating login credentials. Beyond password changes, it explains how to grant access to team members and update linked bank account details within Stripe’s dashboard. Understanding these processes helps maintain strong security and smooth financial operations in Stripe accounts.
Changing a Stripe password requires access to the account’s Settings menu, specifically the Profile and Security section. Users must know their current password and have access to the email associated with the account for verification steps. This guide also clarifies how Stripe’s access controls work, differentiating between password changes and permission settings for other users.
Before you start: What is needed to change a Stripe password
Changing a Stripe password requires access to specific account verification methods and a compliant new password. The email address linked to the Stripe account must be accessible, as Stripe sends verification codes or password reset links to this address. Without access to this email, the password change process cannot proceed.
Current login credentials are necessary to initiate a password change directly via the account settings. If two-factor authentication (2FA) is enabled, access to the registered phone number or authentication app is also required to complete verification. This multi-step authentication helps protect the account from unauthorized access.
The new password must meet Stripe’s complexity requirements. Typically, Stripe mandates a minimum length, inclusion of uppercase and lowercase letters, numbers, and special characters to ensure strong security. Refer to Stripe’s official documentation for the latest password criteria.
It is important to note that Stripe does not use a separate password for Stripe Terminal or other services linked to the account. The main Stripe account credentials govern all access and security controls.
- Confirm access to the email address associated with the Stripe account. Successful access allows receipt of password reset or verification emails.
- Ensure current Stripe login credentials or 2FA device access. This enables completion of identity verification during the password change process.
- Create a new password that complies with Stripe’s complexity rules. Use a combination of letters, numbers, and symbols to meet security standards.
- Understand that all Stripe services use the same account credentials; no separate password is required for Stripe Terminal or related tools.
How do I change my password on Stripe
- Log in to the Stripe Dashboard at dashboard.stripe.com using current email and password credentials. Successful login directs to the main account overview.
- Click the profile icon in the top right corner, then select Profile from the dropdown menu. This opens the user profile settings page.
- Within the profile settings, locate and click Account Settings on the left sidebar. The password management section is found here.
- Find the Change Password option and click it to open the password update form.
- Enter the current password in the designated field to verify identity. Then, input a new password that meets Stripe's criteria: at least 8 characters, containing uppercase, lowercase, numbers, and symbols. A password strength indicator will show if the new password is strong enough.
- Confirm the new password by entering it again in the confirmation field.
- Click Save or Update Password. A success message appears confirming the change, and an email notification is sent to the registered email address for security verification.
Tip: Use a password manager to generate and store strong, unique passwords to improve account security.
How to set up Stripe account and how to create Stripe account
- Visit Stripe’s official website at stripe.com and click the Sign Up button prominently displayed on the homepage. The sign-up form should appear.
- Enter accurate business details including legal business name, address, phone number, and type of business. Provide personal information for the primary account holder such as full name, email, and date of birth. Upon submitting, the system will verify the information format.
- Verify the email address by clicking the confirmation link sent to the registered email inbox. This activates the account and prompts the user to set a secure password that meets Stripe’s requirements, typically including uppercase, lowercase, numbers, and symbols.
- Complete identity verification by submitting requested documents such as a government-issued ID and proof of address. This step is mandatory to comply with financial regulations and unlock full account features.
- Link a valid bank account by entering routing and account numbers. This enables payouts and must match the business or individual name on the Stripe account. A verification process may take a few days.
Typical account setup takes around 10 to 20 minutes, excluding verification wait times. Common pitfalls include entering mismatched business information or incomplete identity documents, which delay approval. Ensuring all inputs are accurate and documents clear minimizes setup issues.
Tip: Use a business email address rather than personal accounts to maintain professional access and easier account recovery.
How to give access to Stripe account
Stripe’s Team feature allows secure collaboration by adding users with specific roles and permissions, eliminating the need to share passwords. Access is controlled by assigning roles such as Administrator, Developer, Analyst, or Support Specialist, each with tailored permissions to match job functions and limit exposure to sensitive data.
To add a team member, navigate to Dashboard > Settings > Team and select + New Member. Enter the user’s email and assign a role. Invited users receive an email to create their own login credentials, maintaining password confidentiality.
- Go to the Stripe Dashboard and click on Settings in the sidebar.
- Select Team under the Business Settings section; the current team list appears.
- Click + New Member; a form opens to add the new user.
- Enter the new member’s email address.
- Choose a role from the dropdown (e.g., Administrator, Developer, Analyst, Support Specialist); each role has defined permissions displayed on the screen.
- Click Invite; the member receives an email invitation to join and set up their login.
- Confirm the new member appears in the team list with the assigned role and status Invited or Active once accepted.
Regularly review team permissions under the same Team settings page to revoke or adjust access as roles evolve or team members leave. This practice minimizes security risks while ensuring appropriate access.
Tip: Use the Administrator role sparingly, as it grants full account control; assign narrower roles to limit potential damage from compromised accounts.
How to change bank accounts in Stripe and stripe how to change bank account details
- Log in to the Stripe Dashboard and go to Settings located in the left-hand menu. Confirm the page loads with your business profile overview.
- Select Bank accounts and scheduling under the Settings menu. This section displays current linked bank accounts and payout schedules.
- Click Add bank account and enter the new bank account details accurately, including account number, routing number, and account holder name. After submission, Stripe may prompt for verification steps such as micro-deposits or instant verification.
- Once verified, set the newly added bank account as the default payout account by selecting it and clicking Make default. The Dashboard will confirm this with a status update or checkmark.
- Decide whether to keep the old bank account on file for fallback or remove it by choosing the appropriate option next to the account details. Removing it will prevent payouts from going there.
After changing the bank account, payout timing remains consistent with Stripe’s standard schedule, typically 2-7 business days depending on the country and business history. The new account will receive payouts according to this schedule without delay once set as default.
Tip: Double-check all bank information before submitting to avoid payout delays caused by incorrect details.
How to change PayPal on Stripe
Stripe and PayPal operate as separate payment platforms with distinct account management systems. Stripe does not directly manage PayPal accounts or credentials. Therefore, if PayPal is used as a payment method alongside Stripe on a website, any changes to PayPal login details must be handled through the PayPal platform itself.
Common confusion arises when users believe Stripe requests bank account passwords or PayPal credentials during setup or updates. Stripe’s security policy strictly forbids asking for bank or PayPal passwords, ensuring all sensitive information is entered only on the official PayPal or bank sites.
To update PayPal details for payments integrated on a site that also uses Stripe, change the credentials within the PayPal account settings. This keeps the payment methods distinct and secure.
Tip: Avoid sharing PayPal or bank passwords with Stripe or any third party; always use official login portals to update credentials.
- Log in to the PayPal account at paypal.com.
Successful login confirms access to the PayPal dashboard. - Navigate to the Settings menu, usually represented by a gear icon.
The account settings page will open. - Update the email address, password, or linked bank accounts as needed.
The changes will be saved, and PayPal will confirm updates via email. - If PayPal is integrated into a website alongside Stripe, update the PayPal credentials wherever the PayPal payment button or API is configured (e.g., in the website’s payment gateway settings).
The site will begin processing PayPal payments with the new credentials.
How to access Stripe account and login to Stripe account
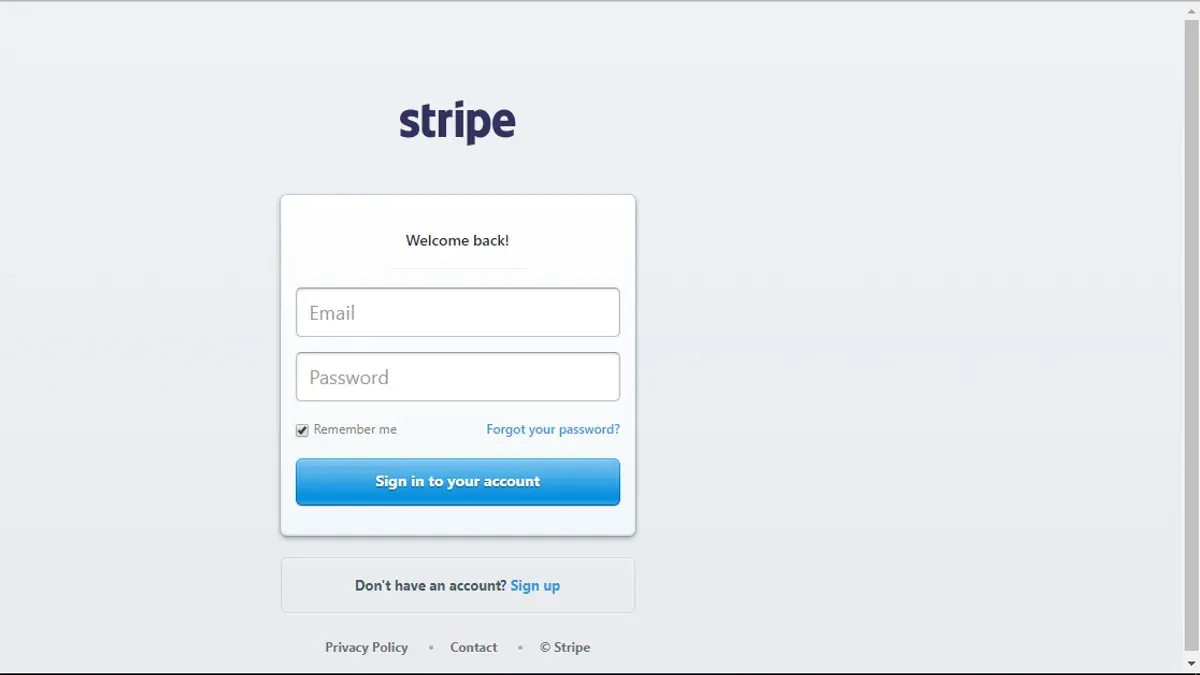
To log into a Stripe account, start by navigating to Stripe’s official login page at https://dashboard.stripe.com/login. Enter the registered email address and password associated with the account. If two-factor authentication (2FA) is enabled, a prompt will request the verification code generated by the authenticator app or sent via SMS.

Login failures are commonly caused by incorrect credentials or expired passwords. In those cases, use the “Forgot your password?” link below the login form. Stripe will send a password reset email to the registered address, allowing creation of a new password that meets security requirements.
Phishing attacks targeting Stripe users often mimic login pages or send fake emails requesting credential updates. Always verify that the URL begins with "https://dashboard.stripe.com" and check the sender’s email address carefully. Do not click links in suspicious emails; instead, navigate directly to Stripe’s official site.
- Go to Stripe login page. The login form should be visible.
- Enter the registered email address and password. Successful input leads to the 2FA prompt if enabled.
- Input the 2FA verification code. Upon success, the Stripe Dashboard appears, confirming login.
- If login fails, click "Forgot your password?" below the form.
- Check the registered email for a password reset link and follow the instructions to create a new password.
Tip: Bookmark Stripe’s official login page to avoid phishing sites and ensure secure access every time.
Troubleshooting common issues when changing Stripe password or managing account access
When the verification email for a password change does not arrive, first check the spam or junk folder. Confirm the registered email address is correct on the Stripe account profile. Use the resend verification email option in the password change prompt. If emails are still not received, verify email filtering rules or contact Stripe support.
If the current password is forgotten, use Stripe’s password reset feature available on the login page. This process sends a reset link to the registered email, allowing password creation without the old password.
Two-factor authentication (2FA) issues can block access. Use backup codes generated when 2FA was set up to regain entry. If backup codes are unavailable or lost, contact Stripe support for identity verification and account recovery.
Bank account verification failures during updates often result from incorrect account numbers, routing numbers, or unsupported bank types. Double-check all entered details and retry after a short wait. Temporary Stripe system delays may also cause verification failures.
- Check spam folder for verification emails; if missing, confirm email address in Profile > Settings > Email and click Resend verification email. Successful receipt means the process is working.
- On login page, select Forgot your password?, enter registered email, and follow reset link sent. Seeing the password reset page confirms success.
- Use backup 2FA codes from Profile > Security > Two-step authentication; entering a valid code grants access. If codes fail, contact support through the Stripe Help Center.
- Re-enter bank account details precisely in Dashboard > Settings > Bank accounts & scheduling, then submit. A confirmation message or verified status indicates success.
Tip: Keep backup 2FA codes stored securely and regularly verify contact email accuracy to avoid access problems.
Frequently asked questions
Why does stripe need my bank password?
Stripe does not require a bank password for account setup or management. Instead, Stripe uses secure API connections and bank verification methods to link bank accounts. If a service asks for a bank password, it is likely not Stripe or could be a phishing attempt. Always provide banking details only through Stripe’s official platform.
How to get stripe account?
To get a Stripe account, visit Stripe’s official website and click on the “Start now” or “Sign up” button. Enter the required business and personal information, including email and business details, then verify the email address. After completing the form and agreeing to the terms, the account will be created and ready for setup.
How to open stripe account?
Opening a Stripe account involves registering on the Stripe website by providing an email, full name, and country. Next, create a password and confirm the email through a verification link. Then, add business information and connect a bank account to start accepting payments.
Why does Stripe need my bank password?
Stripe does not ask for your bank password at any point. Instead, it uses secure banking connections to verify and link your bank account for payouts. If prompted for a bank password, do not enter it and verify the source of the request to avoid fraudulent activity.
How to get Stripe account?
Getting a Stripe account requires signing up on Stripe’s official site by providing business and contact details. After email verification, complete the account setup by adding banking information and business verification documents as required. This enables immediate use of Stripe’s payment processing services.
What this guide does not cover
This guide does not cover advanced security setups like Single Sign-On (SSO) or API key management, which require separate procedures. Users with enterprise-level Stripe accounts or custom integrations should consult Stripe’s official documentation or support for tailored instructions. Complex team permission configurations and automated security tools are beyond the scope of this article.
The single most useful next step is to regularly review the "Team" section in the Stripe Dashboard under Settings to ensure only authorized users have access. This practice helps maintain control over account security and reduces the risk of unauthorized changes.
See also: How to Change Your Revolut Password and Manage Account Security · How to Change Your Payoneer Password and Manage Account Settings · How to Change Your Coinbase Password: Clear Step-by-Step Instructions · How to Change Your ChatGPT Password: Step-by-Step Guide