How to Secure Your Twitch Account: A Step-by-Step Guide
This guide offers clear, actionable steps to secure your Twitch account, protecting your personal info and preventing unauthorized access.

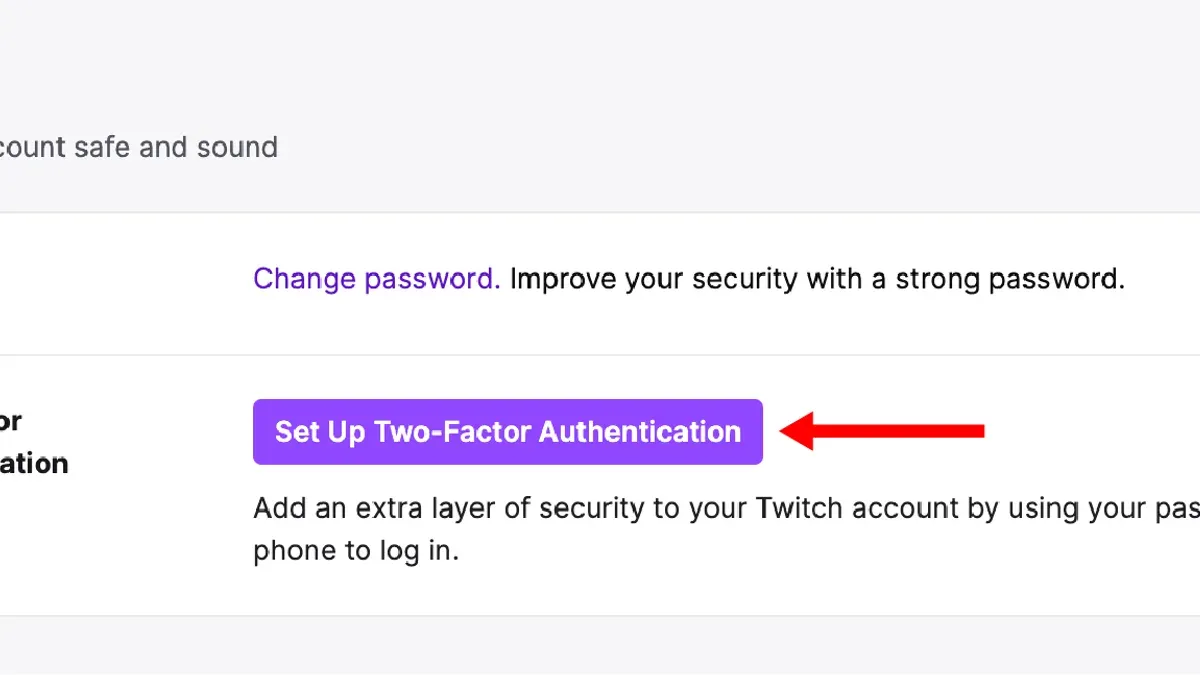
This guide explains how to secure your Twitch account with clear, actionable steps tailored to both streamers and casual users. Securing a Twitch account involves setting strong passwords, enabling two-factor authentication, managing linked accounts, and configuring privacy settings precisely within Twitch's interface.
Before proceeding, ensure access to the registered email and phone number, as these are crucial for verification and recovery. This article covers key areas such as acquiring an account, linking external services like Discord or Twitter, verifying identity through Twitch's security features, and controlling who can view or interact with the channel.
Following this step-by-step approach helps prevent unauthorized access, protects personal information, and maintains control over online presence without relying on generic security advice.
Before you start: What is needed to secure a Twitch account
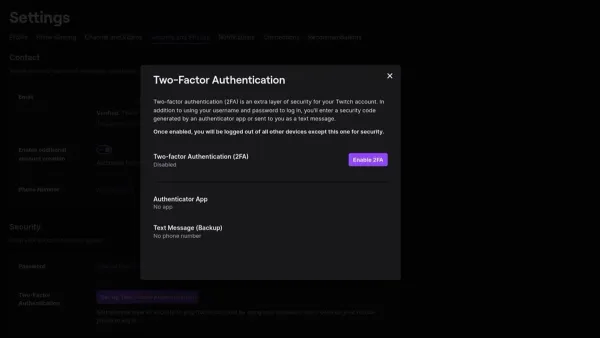
Securing a Twitch account requires certain prerequisites to ensure effective protection against unauthorized access. An active Twitch account or a clear intent to create one is the starting point. Access to a secure email address is essential because it serves as a recovery option and communication channel for security alerts. A mobile phone capable of receiving authentication codes is necessary for enabling two-factor authentication (2FA), which significantly reduces breach risks.
Familiarity with Twitch’s features, including account linking options and privacy settings, prepares the user to manage security configurations confidently. Using a password manager or another safe method to store credentials helps maintain strong, unique passwords for Twitch and linked accounts. Weak passwords and the absence of 2FA remain among the primary causes of Twitch account compromises.
Setting up these elements before proceeding allows users to follow subsequent steps without interruption, ensuring a streamlined security process.
- Confirm access to the email address associated with the Twitch account. Successful verification means being able to receive and open emails from Twitch.
- Have a mobile device ready to receive SMS or authenticator app codes. Test by receiving a text or app notification outside Twitch.
- Familiarize with Twitch’s Account Settings by logging in and navigating to the “Security and Privacy” tab under settings. The page should display options like “Two-Factor Authentication” and “Connections.”
- Choose and set up a password manager or secure credential storage method. Confirm it can generate and save strong passwords and retrieve them when needed.
How to get a Twitch account
- Go to Twitch's official website at twitch.tv and click the Sign Up button in the top-right corner. The sign-up form should appear.
- Enter a unique username that is easy to remember but not linked directly to personal information. This username will identify the account publicly.
- Choose a strong password that combines at least 12 characters, including uppercase letters, lowercase letters, numbers, and symbols. For example, a password like G7v$Qz!r9Lp# is stronger than password123. Avoid common words or sequences.
- Input a valid email address that will be used for account verification and recovery. Twitch will send a confirmation email; the account is not fully active until this is verified.
- Enter your date of birth to confirm you meet Twitch's age requirements. Upon successful entry, the form will allow proceeding.
- Check the boxes to agree to Twitch's Terms of Service and Privacy Policy.
- Complete the CAPTCHA challenge to confirm the user is not a bot. A confirmation message or redirect to the Twitch homepage signals success.
- After account creation, navigate to Settings > Security and Privacy to add a phone number for recovery and set up two-factor authentication (2FA) for stronger security.
Tip: Use a reputable password manager to generate and store your Twitch password securely, avoiding reuse across sites.
How to connect accounts to Twitch
Linking other accounts such as Discord, YouTube, or social media platforms to Twitch improves both functionality and security. It enables streamlined content sharing, enhanced chat moderation, and easier account recovery. For example, connecting a Discord server allows Twitch streamers to automate chat roles and verify viewers, reducing spam and unauthorized access.
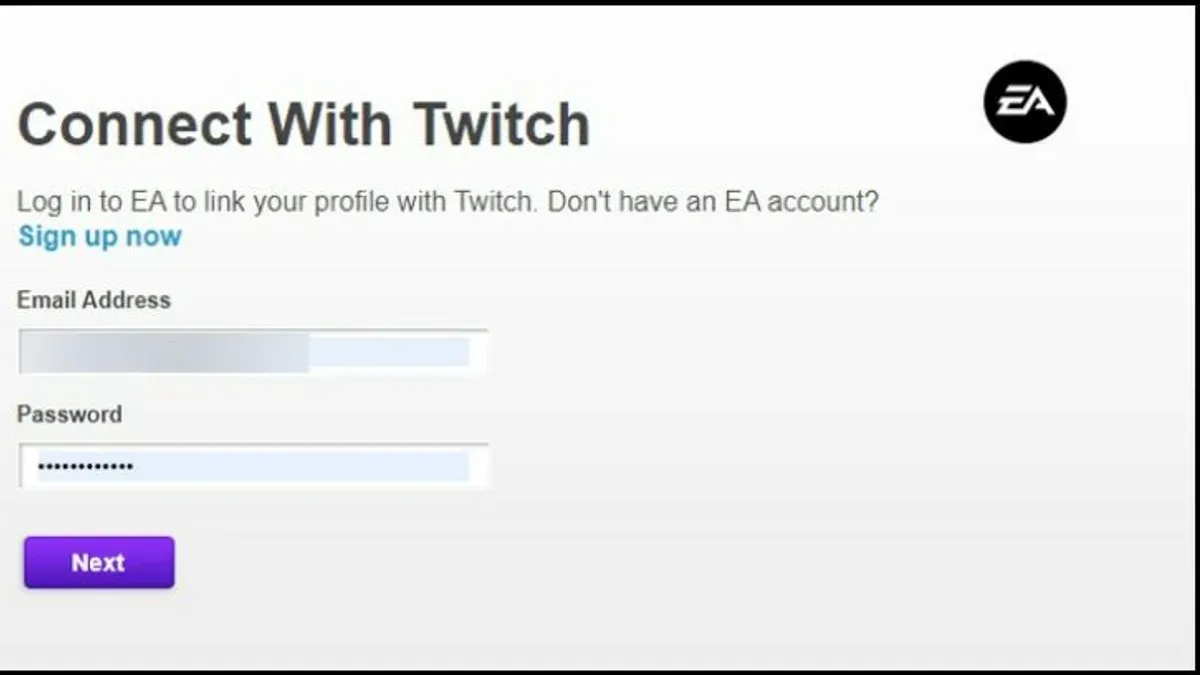
To link accounts safely, navigate to the Twitch dashboard, select the "Settings" tab, then click "Connections." Here, a list of compatible services appears. Choose the desired platform, such as Discord, and authorize the connection by logging in to that service and granting Twitch the requested permissions. Successful linking is confirmed by the connected account showing under "Connections" with an active status.
Unlinking accounts is equally straightforward. Return to the same "Connections" menu, find the linked account, and select "Disconnect." Confirm the action to revoke Twitch’s access and remove the integration. Disconnecting is advisable when changing account passwords or when suspecting unauthorized linkage.
- Access the Twitch dashboard and open "Settings," then select "Connections." The connections page will display supported platforms.
- Click "Connect" beside the desired service, for example, Discord. A new window prompts for login credentials.
- Log in to the external account and authorize Twitch permissions. Twitch will confirm the connection, and the service will appear as linked.
- To unlink, click "Disconnect" next to the account and confirm removal. The service will no longer show as connected.
Tip: Linking Discord to Twitch enables auto-role assignment in chat, enhancing moderation and reducing the risk of unauthorized users disrupting streams.
How to verify account on Twitch
Verifying a Twitch account is essential for enhancing security and accessing advanced streaming features such as custom emotes and monetization options. A verified account also reduces the risk of impersonation and unauthorized access, as Twitch prioritizes verified users in trust and safety protocols.
- Navigate to the Twitch Settings by clicking the profile icon in the top-right corner and selecting "Settings." Verify that the registered email is confirmed; if not, complete email verification first.
- Go to the "Security and Privacy" tab within Settings and locate the "Verify Your Identity" section. Click on the "Start Verification" button to initiate the process.
- Submit required information accurately, including government-issued ID or official documentation as prompted. Ensure all details match the Twitch account information to avoid rejection.
- Complete any additional security steps, such as two-factor authentication setup if not already enabled, since Twitch may require this for verification to proceed.
- Wait for Twitch to process the verification request. This typically takes a few days; avoid submitting multiple requests to prevent delays.
Common pitfalls include submitting unclear or mismatched identification and neglecting to enable two-factor authentication beforehand. These issues can prolong verification or cause denials.
Tip: Verified accounts tend to experience fewer security incidents and impersonation reports due to stronger identity confirmation.
How to make your Twitch account online and private
Twitch accounts can appear online or offline to other users, affecting interaction and visibility. Being "online" means the account shows activity status and can participate in chats, while "offline" hides status, limiting unsolicited interactions. Adjusting privacy settings allows control over who views channel activity and personal information.
- Log into Twitch and click the profile icon in the top-right corner to open the user menu. Select "Settings" and then navigate to the "Privacy & Safety" tab. The presence of options related to "Activity Status" will appear.
- Locate the "Show Activity Status" toggle. Turning this off sets the account status to offline, hiding online presence from followers and chat rooms. A confirmation message or the toggle switching to off indicates success.
- Under "Privacy Settings," find "Who can see your channel" or "Channel Visibility." Choose between "Public," "Followers Only," or "Subscribers Only." Setting to "Followers Only" or "Subscribers Only" limits exposure and interaction to trusted groups.
- Further down, adjust "Allow Whispers from" to "Friends and Followers Only" to restrict private messages and reduce unwanted contact. The setting will save automatically, confirmed by a brief notification.
- Review the "Blocked Users" list to ensure unwanted accounts cannot interact. Adding users here prevents them from seeing the account online or engaging in chat.
By default, Twitch accounts are public and show online status, increasing exposure but also risk of unsolicited interactions. Customizing privacy settings reduces visibility and interaction to select groups, protecting personal presence while maintaining online availability for trusted users.
Tip: Regularly review privacy settings and blocked users to maintain desired control over who sees and interacts with the account.
How to block an account on Twitch
Blocking on Twitch stops unwanted interactions by preventing the blocked user from chatting, following, or whispering. It differs from reporting, which alerts Twitch about policy violations but does not restrict the user’s ability to interact unless Twitch takes action. Blocking is the immediate, user-controlled way to protect the account environment from harassment or spam.
Common harassment scenarios include repeated offensive messages in chat, unsolicited direct messages, or disruptive behavior during streams. Blocking these users cuts off their communication and limits exposure to toxic content.
To block an account on desktop:
- Navigate to the user’s profile by clicking their username in chat or search.
- Click the three-dot menu button next to the Follow button; a dropdown appears.
- Select Block from the menu; a confirmation popup appears.
- Confirm the block; the user is now blocked, and chat messages from them will no longer appear.
To block an account on mobile:
- Open the Twitch app and go to the user’s profile via chat or search.
- Tap the three-dot icon in the upper right corner to open options.
- Choose Block and confirm the action.
- The user will be blocked, preventing chat and follow interactions.
When blocked, the user cannot send whispers, chat messages, or follow the blocker’s channel. However, blocking does not prevent the blocked user from viewing public content. To limit visibility, adjust privacy settings separately.
Tip: Use blocking immediately after encountering harassment to maintain a safe streaming environment without waiting for Twitch’s intervention.
How to share your Twitch account safely
Sharing Twitch account passwords or credentials directly risks unauthorized access, data loss, and potential bans. Instead, use Twitch's built-in user roles to delegate specific tasks without handing over full control. The Editor and Moderator roles allow trusted team members to manage streams, chat, and channel settings securely.
To add an Editor, open Twitch Studio or the Creator Dashboard, go to Settings > Roles, and invite the user by username. Editors can update stream info and manage clips but cannot change account security settings. Moderators handle chat moderation without access to account details.
For collaborative streaming without sharing accounts, set up team streaming via Twitch Studio or third-party tools. This provides shared streaming control while keeping individual accounts separate.
- Open the Creator Dashboard and navigate to Settings > Roles. The Roles page will display current users and permissions.
- Click "Add New Role" and enter the username of the person to add as Editor or Moderator. A confirmation message will appear once the invite is sent.
- The invited user accepts the role via their Twitch notifications. When accepted, the new role appears active on the Roles page.
Tip: Regularly review assigned roles and revoke access immediately if a collaborator no longer needs permissions to maintain security.
Troubleshooting common Twitch login and security issues
Login failures and account locks are common issues users face on Twitch. If login attempts repeatedly fail, verify the username and password for accuracy, then use the “Forgot Password?” link to reset credentials. A locked account usually indicates multiple failed login attempts or suspicious activity, triggering Twitch’s security protocols.
If the account is locked and the linked phone number is unavailable for verification, use the email recovery option by selecting “Trouble logging in?” and then choosing to receive a recovery link via email. Twitch’s support team can assist further if automated options fail, but response times vary.
Suspicious activity signs include unexpected password changes, unfamiliar login locations, or unauthorized streaming. Immediately change the password and review the connected devices through Settings > Security > View Login History. Revoke access to unrecognized devices and enable two-factor authentication if not already active.
- Attempt login with correct credentials; success leads to the dashboard screen.
- If login fails, click “Forgot Password?” and enter the registered email; a reset link should arrive within minutes.
- If locked out and no phone access, select “Trouble logging in?” and choose email recovery; check inbox for instructions.
- Upon access, navigate to Settings > Security > View Login History to identify unauthorized access.
- Change password and enable two-factor authentication via Settings > Security; confirmation messages indicate success.
- Contact Twitch Support if issues persist, providing account verification details as requested.
Tip: Regularly monitor login history and update recovery options to minimize downtime from security incidents.
Frequently asked questions
How to make an account on twitch?
Create an account on Twitch by visiting twitch.tv and clicking the Sign Up button. Enter a valid email, choose a username, create a strong password, and provide your date of birth. Complete the CAPTCHA verification, then confirm your email through the link sent to your inbox to activate the account fully.
How to link your twitch account?
Link external accounts to Twitch by navigating to Settings > Connections. From there, select the platform to connect, such as YouTube, Discord, or Steam, and follow the prompts to authorize the linkage. Linking accounts enables streamlined login and additional security features.
How to block twitch accounts?
Block a Twitch user by going to their channel page, clicking the three-dot menu next to the Follow button, and selecting Block. This prevents the blocked user from sending whispers, chatting, or interacting with the account. Manage blocked users anytime under Settings > Security and Privacy > Blocked Users.
How to private a twitch account?
Twitch does not offer a fully private account option, but users can restrict interactions by disabling Whispers from strangers and setting channel chat to followers-only or subscribers-only mode. Adjust these settings under Settings > Security and Privacy and in the channel’s moderation settings.
How to make an account on Twitch?
To create a Twitch account, go to the website and select Sign Up. Fill in the required fields: email, username, password, and birthdate. Verify the account via email and set up two-factor authentication for enhanced security.
What this guide does not cover and who should do something else
This guide does not cover advanced security measures such as hardware security keys or Twitch’s partner-specific protections that require additional approval. Users with compromised devices or poor overall digital hygiene may still face risks despite following these steps. For professional streamers who require enhanced protection, consulting Twitch’s official partner support and implementing multi-factor authentication methods beyond what is described here is recommended.
Those experiencing persistent unauthorized access or account takeover attempts should consider a full device security audit, including malware scans and updating all software. Basic Twitch account security is necessary but not sufficient when underlying device security is weak.
The single most useful next step after securing account settings is regularly reviewing the Connected Accounts section under Settings > Connections to ensure no unauthorized apps or services have access. Removing any unrecognized connections immediately limits third-party access and reduces exposure to potential breaches.
See also: How to Log Out of Twitch on All Devices: Complete Step-by-Step Guide · How to Secure Your Snapchat Account: A Step-by-Step Guide · How to Secure Your Threads Account: A Step-by-Step Guide · How to Secure Your Tumblr Account: A Clear Step-by-Step Guide