How to Encrypt a USB Drive: Step-by-Step Guide for Mac and Windows
This guide explains how to encrypt a USB drive on Mac and Windows with clear steps to secure your sensitive data effectively.

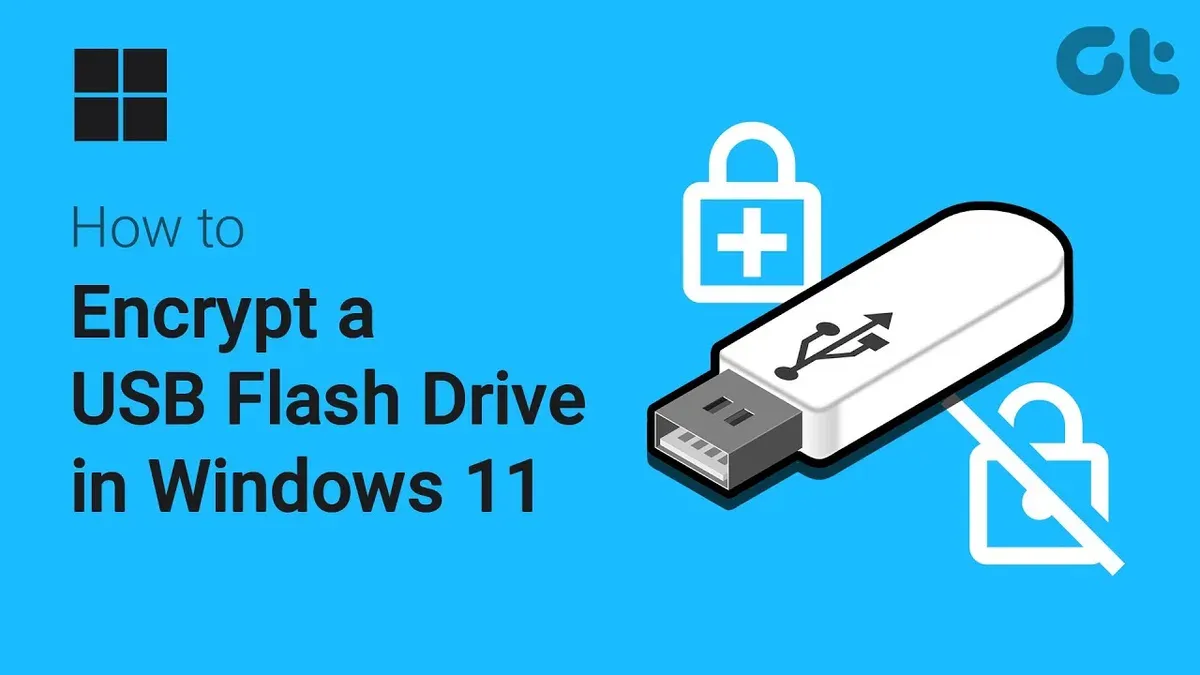
This article explains how to encrypt a USB drive using native and third-party methods on both Mac and Windows platforms.
Encrypting a USB drive protects sensitive data from unauthorized access by requiring a password or encryption key to access its contents. The process differs depending on the operating system and edition, such as Windows Home, which lacks built-in BitLocker encryption. Mac users can utilize FileVault or Disk Utility for encryption, while Windows users might rely on BitLocker or alternative tools when BitLocker is unavailable.
The guide includes practical, step-by-step instructions and evaluates the advantages and limitations of each method to help select the best approach for specific security needs and device compatibility, including mixed Mac/Windows environments. Attention to detail, such as formatting the drive correctly and backing up data before encryption, ensures a smooth encryption process.
Before you start: What is needed to encrypt a USB drive
Encrypting a USB drive requires certain prerequisites to ensure the process runs smoothly and data remains secure. First, a USB flash drive with enough free space is essential; the drive should be formatted or have sufficient room for the encryption metadata and user files. Administrator rights on the computer are necessary because access to system security settings and disk management tools is required.
The operating system version also matters, as native encryption tools are supported only on specific OS versions. For instance, macOS supports encryption on drives using FileVault or Disk Utility starting from macOS 10.7 (Lion) onward, while Windows supports BitLocker on Professional and Enterprise editions starting with Windows Vista, but Windows Home editions require alternative methods.
Users should have a basic understanding of encryption concepts, such as the importance of strong passwords and secure password management, since losing the encryption key or password can result in permanent loss of access to the drive. It is also critical to back up all important data before beginning encryption, especially if formatting is involved, as the process can erase existing data.
Operating System Support Comparison
| Operating System | Native Encryption Tool | Supported Editions | Minimum Version |
|---|---|---|---|
| macOS | FileVault / Disk Utility | All editions | 10.7 (Lion) |
| Windows | BitLocker | Pro, Enterprise | Vista |
| Windows | Third-party tools | Home, Pro, Enterprise | All |
Preparation Checklist
- Ensure the USB drive has sufficient free space or back up and format it if necessary; success is indicated by the drive appearing in Disk Utility (Mac) or Disk Management (Windows).
- Verify administrator rights by confirming the ability to access system preferences or control panel settings requiring admin approval.
- Check the operating system version and edition via 'About This Mac' or 'System Information' on Mac, and 'Settings > System > About' on Windows; native encryption tools should be available accordingly.
- Review encryption basics, including password strength and backup strategies; prepare a secure password manager or secure physical note.
- Create a full backup of the USB drive’s data to a separate location; verify backup integrity by opening files on another device.
Tip: Confirming OS compatibility and backing up data beforehand can prevent data loss and compatibility issues during encryption.
How to encrypt a USB drive on Mac using FileVault and Disk Utility
Mac users have two main native options for encrypting USB drives: creating an encrypted disk image with Disk Utility or formatting the entire USB drive with encryption. Both methods utilize strong encryption algorithms and require a secure password.
Creating an encrypted disk image on the USB drive
- Open Disk Utility from the Applications > Utilities folder.
- Click File > New Image > Blank Image.
- In the dialog, set a name and location on the USB drive for the disk image file.
- Choose a size appropriate for storage needs—this will be the maximum available space within the image.
- Set Format to Mac OS Extended (Journaled) and Encryption to 256-bit AES encryption for strong security.
- Enter and verify a strong password; leave “Remember password in my keychain” unchecked for better security.
- Click Create. The encrypted disk image is created on the USB drive.
- Double-click the disk image to mount it; it will prompt for the password and appear as a separate drive in Finder.
Tip: Encrypted disk images allow flexible storage inside a single file without encrypting the entire USB drive.
Encrypting the entire USB drive by formatting
- Open Disk Utility and select the USB drive (the device name, not just the partition).
- Click Erase.
- Set Format to Mac OS Extended (Journaled, Encrypted) or APFS (Encrypted) for newer macOS versions.
- Enter and verify a strong password; avoid saving it to the keychain.
- Click Erase to format and encrypt the entire drive.
- After completion, the encrypted USB drive will require the password each time it is mounted.
Tip: Encrypting the entire drive ensures all contents are protected but will erase existing data.
When choosing encryption algorithms, 256-bit AES is the standard for robust security on macOS. Password strength is critical—use complex, unique passwords to prevent unauthorized access.
To access an encrypted drive or disk image, mount it by double-clicking and entering the password. Once mounted, it behaves like a normal drive in Finder.
How to encrypt a USB drive with BitLocker on Windows
BitLocker Drive Encryption is a built-in security feature available on Windows Pro and Enterprise editions, allowing users to encrypt USB drives easily. It uses AES encryption to protect data and supports password or smart card authentication.
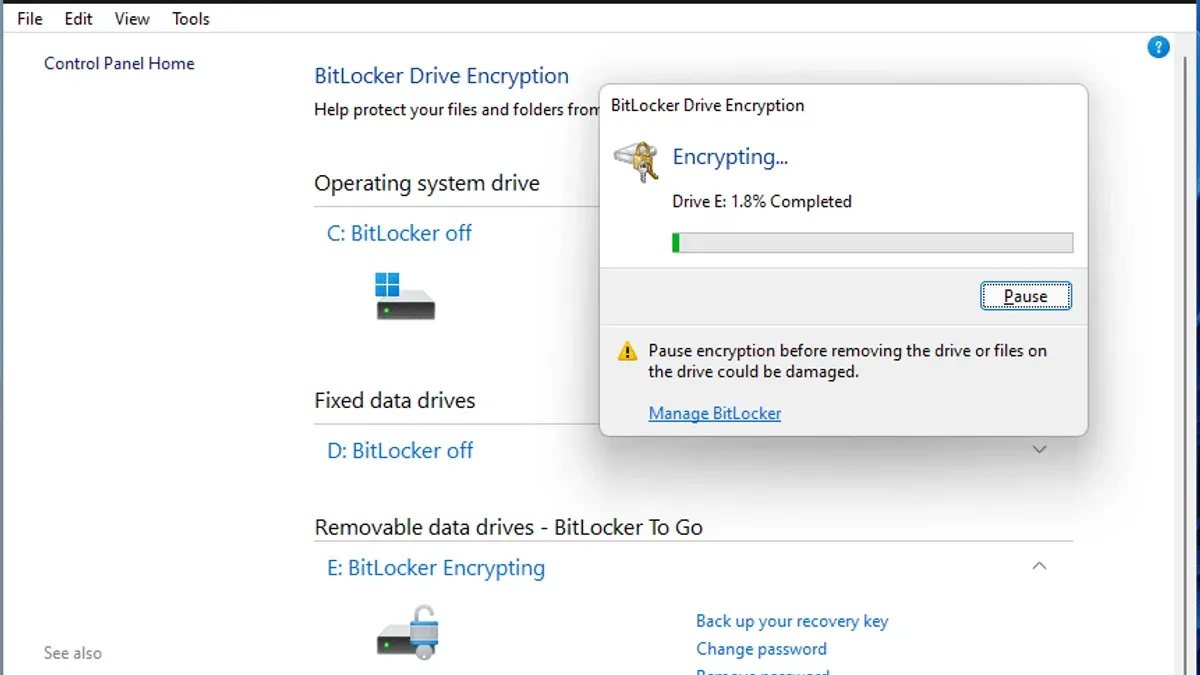
- Insert the USB drive into the Windows PC and open File Explorer. The drive should appear under This PC.
- Right-click the USB drive and select Turn on BitLocker. The BitLocker setup wizard will launch.
- Choose how to unlock the drive: select Use a password to unlock the drive or Use my smart card to unlock the drive. Enter a strong password if using the password option, ensuring it meets complexity requirements.
- Click Next, then choose how to back up the recovery key. Options include saving to a Microsoft account, saving to a file, or printing it. Securely store this recovery key as it is essential for data recovery if the password is lost.
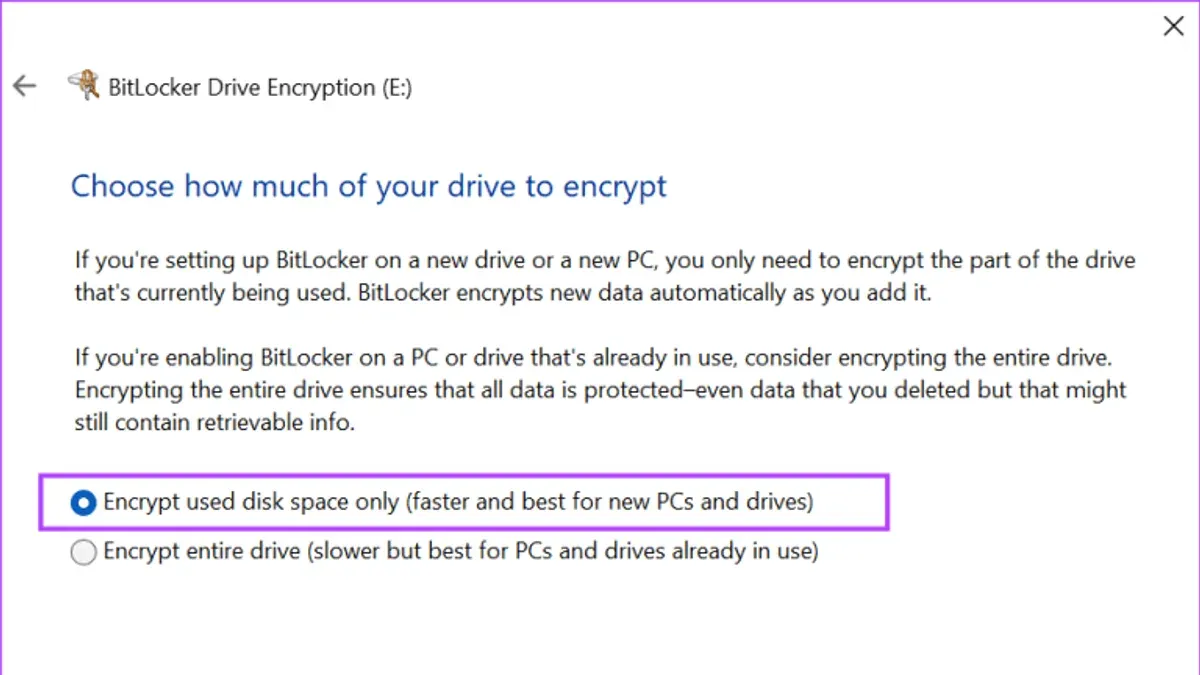
- Choose the encryption mode: select Encrypt entire drive for comprehensive protection or Encrypt used disk space only for faster encryption on new drives.
- Click Start encrypting. The process may take several minutes depending on the drive size. A progress bar will indicate completion status.
- Once finished, the drive icon will display a lock symbol. The USB drive is now encrypted and will prompt for a password or smart card authentication when connected to any compatible Windows machine.
BitLocker-encrypted drives are widely supported on Windows Pro and Enterprise editions, though they cannot be accessed natively on Windows Home editions without third-party tools. Adoption of BitLocker is common in enterprise environments due to its integration with Windows and Active Directory for key management.
Tip: Always keep multiple backups of the recovery key in separate, secure locations to prevent data loss.
How to encrypt a USB drive on Windows 11 Home without BitLocker
Windows 11 Home does not include BitLocker encryption, but users can secure USB drives with third-party tools like VeraCrypt, a free and open-source encryption software. VeraCrypt offers strong AES-256 encryption and is widely used for securing portable drives.
Steps to encrypt a USB drive with VeraCrypt:
- Download and install VeraCrypt from the official website. Once installed, launch the application.
- Insert the USB drive and note its drive letter in File Explorer.
- In VeraCrypt, click Create Volume to start the Volume Creation Wizard.
- Select Encrypt a non-system partition/drive and click Next. Choose Standard VeraCrypt volume.
- Pick the USB drive letter corresponding to the inserted drive, then click Next. Confirm to erase all data on the drive.
- Choose an encryption algorithm, such as AES (default), and click Next. AES offers strong encryption with good performance.
- Set a secure password and click Next. Use a strong password to ensure security.
- Format the volume by moving the mouse randomly within the window to generate entropy, then click Format. After completion, the drive is encrypted.
- To use the encrypted drive, mount it in VeraCrypt by selecting a drive letter and clicking Mount, then enter the password. The drive will appear as a mounted volume in File Explorer.
Pros and cons of VeraCrypt versus BitLocker:
- Security: Both use strong AES-256 encryption, but BitLocker integrates with Windows security features like TPM chips, which VeraCrypt does not.
- Speed: BitLocker often performs faster due to OS-level optimization; VeraCrypt encryption can be slightly slower, especially on older hardware.
- Compatibility: VeraCrypt volumes can be accessed on Windows and Mac with the VeraCrypt application installed, making it suitable for mixed environments. BitLocker-encrypted drives require Windows for access unless third-party tools are used.
- Ease of use: BitLocker offers seamless integration and simpler setup on supported Windows editions; VeraCrypt requires manual mounting and unmounting of volumes.
Tip: Always backup data before encrypting, as the process will erase existing content on the USB drive.
How to encrypt a USB drive for Mac and Windows compatibility
Encrypting a USB drive for use on both Mac and Windows presents challenges due to incompatibilities in native encryption methods. FileVault and BitLocker encrypted drives are typically restricted to their respective platforms, making cross-platform access difficult.
VeraCrypt offers a reliable cross-platform encryption solution. It allows creating encrypted volumes accessible on both macOS and Windows, provided VeraCrypt is installed on each system. Formatting the USB drive with the exFAT file system ensures broad compatibility, as both operating systems support exFAT natively.
- Download and install VeraCrypt on both Mac and Windows machines.
- Format the USB drive as exFAT: on Mac, use Disk Utility to erase and select exFAT; on Windows, use File Explorer’s format option with exFAT selected. Successful formatting shows the drive ready with exFAT.
- Open VeraCrypt and select "Create Volume" to start the Volume Creation Wizard.
- Choose "Create an encrypted file container" and click Next.
- Click "Select File", navigate to the USB drive, and name the container (e.g., "SecureVolume"), then click Save.
- Set encryption options (AES is default and recommended) and click Next.
- Specify the volume size based on USB capacity and click Next.
- Create and confirm a strong password; VeraCrypt will warn if the password is weak.
- Move the mouse randomly within VeraCrypt to generate encryption keys, then click Format.
- Once formatting completes, click Exit. The encrypted container file is now on the USB drive.
- To access files, mount the container in VeraCrypt by selecting a drive slot, clicking "Select File" to open the container, then clicking "Mount" and entering the password. The mounted volume appears as a virtual drive for file operations.
File transfer speeds within the VeraCrypt container are slightly slower than native drive speeds due to encryption overhead, but performance is generally acceptable for typical use.
Limitations: Native encryption methods like FileVault or BitLocker do not support cross-platform read/write access. VeraCrypt requires software installation on every device accessing the encrypted volume, which may not be feasible in all environments.
Tip: Always back up the VeraCrypt volume file and remember the password; losing either means losing access to encrypted data.
Best practices for encrypting a USB drive for free
Free encryption tools provide accessible options for securing USB drives without additional cost. Popular choices include VeraCrypt, BitLocker To Go (available on Windows Pro editions), and macOS's Disk Utility encrypted disk images. VeraCrypt, widely praised for its robust AES-256, Serpent, and Twofish encryption algorithms, is open-source and regularly audited, making it a strong candidate for cross-platform use.
While these free tools offer solid protection, they come with limitations compared to some paid solutions. For instance, free tools may lack advanced management features, centralized administration, or support for hardware-accelerated encryption, which can affect speed and ease of use. Users should also be aware that some free options require manual key backup and careful password management to avoid data loss.
Security considerations when using free encryption include choosing strong, unique passwords and securely storing encryption keys or recovery files offline. Relying solely on device memory or cloud storage without encryption can expose keys to theft or loss.
Top free encryption tools and their features:
| Tool | Platform | Encryption Algorithms | Cross-Platform | User Ratings |
|---|---|---|---|---|
| VeraCrypt | Windows, macOS, Linux | AES-256, Serpent, Twofish | Yes | High |
| BitLocker To Go | Windows Pro/Enterprise | AES-128/256 | No | High |
| macOS Disk Utility | macOS | AES-256 | No | High |
Tip: Always keep at least two secure backups of encryption keys or recovery passwords in separate physical locations to prevent permanent data loss.
Troubleshooting common issues when encrypting USB drives
USB drives sometimes fail to be recognized due to incompatible file formats or hardware issues. Common error messages include "The disk you inserted was not readable by this computer" on Mac or "You need to format the disk before you can use it" on Windows. Reformatting the drive to a compatible file system like exFAT or FAT32 often resolves these errors, but backing up data first is essential.
Forgotten passwords or lost recovery keys create critical access problems. Without these credentials, encrypted data is effectively inaccessible. Users should store recovery keys securely, for example, in password managers or physical safes. When keys are lost, data recovery is usually impossible without professional services, which can be costly and not guaranteed.
Performance slowdowns can occur after encryption due to the overhead of real-time data encryption and decryption. This is especially noticeable on older hardware or with software-based encryption like VeraCrypt. Disabling background applications and ensuring the USB drive is connected to a USB 3.0 port may improve speed.
Access issues between Mac and Windows devices often arise from incompatible encryption formats. Drives encrypted with native tools may only be accessible on the same OS. Using cross-platform solutions like VeraCrypt with exFAT formatting helps but requires installing compatible software on all used devices.
Corruption risks increase if a USB drive is removed during encryption or if power loss occurs. Error messages such as "The disk is corrupted and unreadable" indicate this problem. Running disk repair utilities like macOS Disk Utility's "First Aid" or Windows' "Check Disk" can sometimes restore functionality. Regular backups remain the best safeguard.
Tip: Always safely eject USB drives and avoid interrupting encryption processes to minimize corruption risks.
Further reading
Frequently asked questions
How to encrypt a usb drive windows 11?
In Windows 11, encrypting a USB drive is typically done using BitLocker. Right-click the USB drive in File Explorer, select "Turn on BitLocker," and follow the prompts to set a password and encryption method. This process requires Windows 11 Pro, Enterprise, or Education editions, as BitLocker is not available on Home editions by default.
How to encrypt a usb drive using bitlocker?
To encrypt a USB drive with BitLocker, open File Explorer, right-click the drive, and choose "Turn on BitLocker." Select a password or smart card authentication, choose how much of the drive to encrypt, and save the recovery key securely. The encryption process runs in the background and ensures the drive's data is protected when removed.
How to encrypt a usb drive windows 10?
Windows 10 users can encrypt USB drives using BitLocker if they have Pro, Enterprise, or Education editions. The steps mirror those in Windows 11: right-click the drive in File Explorer, select "Turn on BitLocker," and complete the setup with a password and recovery key. Home edition users will need third-party tools or alternative methods.
How to encrypt a usb drive windows 11 home?
Windows 11 Home does not include BitLocker, so encrypting a USB drive requires third-party software like VeraCrypt or using Windows' built-in device encryption if available. VeraCrypt offers strong encryption but involves more setup steps. Users should carefully back up encryption keys and understand compatibility limitations.
how to encrypt a usb drive on mac
On a Mac, encrypting a USB drive can be done using Disk Utility or Finder. In Disk Utility, select the drive, click "Erase," choose an encrypted format like APFS (Encrypted), then set a password. Alternatively, right-click the drive in Finder and choose "Encrypt" to apply password protection without formatting.
Limits of this guide and when to seek professional solutions
This article does not cover enterprise-grade hardware encryption devices or solutions that require specialized IT administration. Users handling extremely sensitive data or operating in regulated industries should consider professional-grade encryption hardware or consult a security expert to ensure compliance and maximum protection.
For most moderate security needs, native and widely used third-party encryption tools provide sufficient protection. However, these methods may not defend against sophisticated attacks or hardware tampering.
Review the encryption method’s compatibility with your devices and ensure backups of unencrypted data before proceeding to avoid data loss.
To maximize security and ease of use, the most useful next step is to test the chosen encryption method on a non-critical USB drive. This practice confirms compatibility and helps avoid mistakes when encrypting important data.