How to Share a Reminders List in Reminders on Mac
This guide shows how to share a reminders list in Reminders on Mac, manage permissions, and troubleshoot common issues for smooth collaboration.

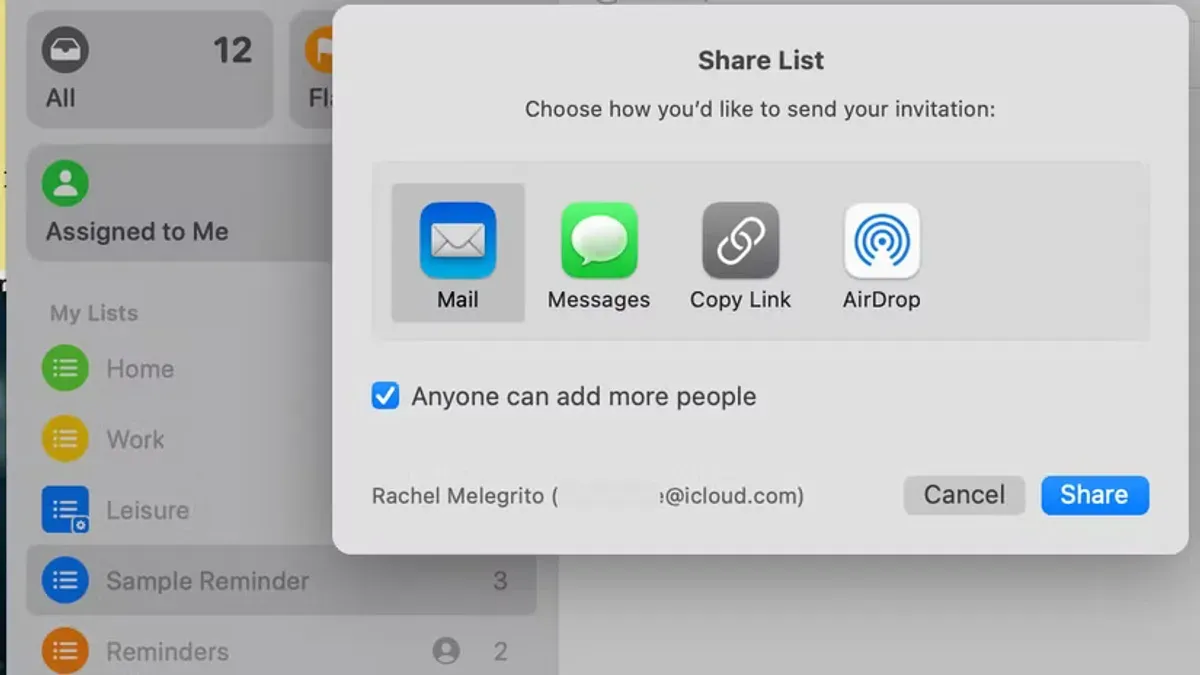
You have a Reminders list on your Mac that you want to share with family, friends, or coworkers to keep everyone on the same page. Maybe you want to assign tasks or simply make sure your grocery list is visible to all household members.
This article explains how to share a reminders list in Reminders on Mac with clear, step-by-step instructions. You'll learn how to set up sharing, manage permissions for collaborators, handle situations involving multiple Apple IDs or devices, and troubleshoot common issues that might arise. By following this guide, you’ll be able to collaborate smoothly and keep your shared tasks organized.
Key takeaways
- Sharing a Reminders list requires signing in with your Apple ID and using iCloud for syncing.
- You can invite collaborators directly from the Reminders app using their Apple IDs or email addresses.
- Permissions let you allow others to view or edit the list, giving you control over collaboration.
- Managing multiple Apple IDs involves ensuring all devices are properly signed into iCloud and Reminders is enabled.
- Common issues include syncing delays and permission errors, which can often be fixed by checking iCloud settings and internet connectivity.
Before you start: What you need to share a reminders list on Mac
Sharing a reminders list on your Mac requires specific setup steps to ensure smooth collaboration. First, you and the people you want to share with must be signed in to your Apple IDs on your respective devices. Without Apple ID sign-in, iCloud syncing and sharing won’t work. Double-check that your Reminders app is updated and running on macOS with iCloud enabled, as only iCloud-based reminders lists are shareable.
It’s important to understand that reminders stored locally on your Mac or synced through other accounts like Gmail or Exchange cannot be shared via the Reminders app’s sharing feature. Apple’s support resources note that the majority of users who attempt sharing face issues because their lists are not iCloud-based.
Before proceeding, make sure you know how your Reminders lists are organized. Lists must exist within the iCloud section of the app to be sharable. This setup ensures that changes are synced across devices for all collaborators.
- Open System Settings and select your Apple ID at the top. You should see your name and email confirming you are signed in.
- Go to Apple ID > iCloud and make sure Reminders is toggled on. This enables syncing and sharing via iCloud.
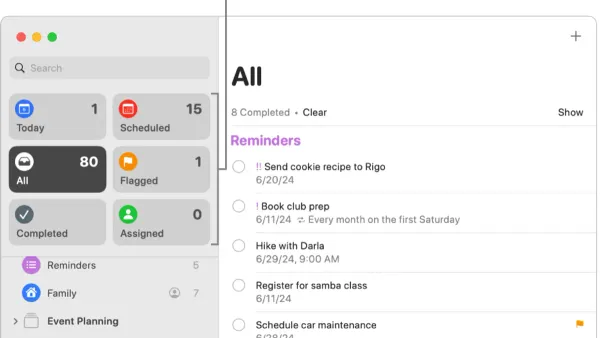
- Open the Reminders app and look for your lists under the iCloud heading. Lists here are eligible to share; local lists appear under “On My Mac” and cannot be shared.
- Ensure your Mac is running the latest version of macOS with the Reminders app updated. Check Software Update in System Settings to confirm.
How to share reminders list on Mac: Step-by-step guide
- Open the Reminders app on your Mac and locate the list you want to share. When you select the list, its contents appear on the right side of the window.
- Click the Share button next to the list’s name in the sidebar. Alternatively, right-click (or Control-click) the list name and select Share from the context menu. You should see a sharing options panel appear.
- Choose how to invite collaborators by selecting Mail, Messages, or Copy Link. For example, selecting Messages opens the Messages app with a pre-filled invitation message you can send to your contact.
- Set collaborator permissions by clicking the permission icon next to their name or invitation. You can choose between Can Edit (allowing full changes) or View Only (read-only access). Confirm the appropriate level based on how much control you want to grant.
- Send the invitation through your chosen method. After sending, check the list sidebar for a shared icon indicating the list is now shared. Collaborators will receive the invitation and can accept to begin collaboration.
Worked example: To share a "Grocery List," select it, click Share, choose Messages, enter your collaborator’s contact, set their permission to "Can Edit," and send. The shared icon appears next to "Grocery List," confirming sharing is active.
Each step is accompanied by clear visual cues within the Reminders app, making it easy to follow and confirm you’re on the right path.
How to manage shared reminders list permissions and collaborators
After sharing a Reminders list, you can control who can view or edit it by managing collaborators and their permissions. To see who currently has access, open the shared list and click the Share button, which looks like a person icon. Here, you’ll find a list of collaborators along with their current permission status—either "Can Edit" or "View Only."
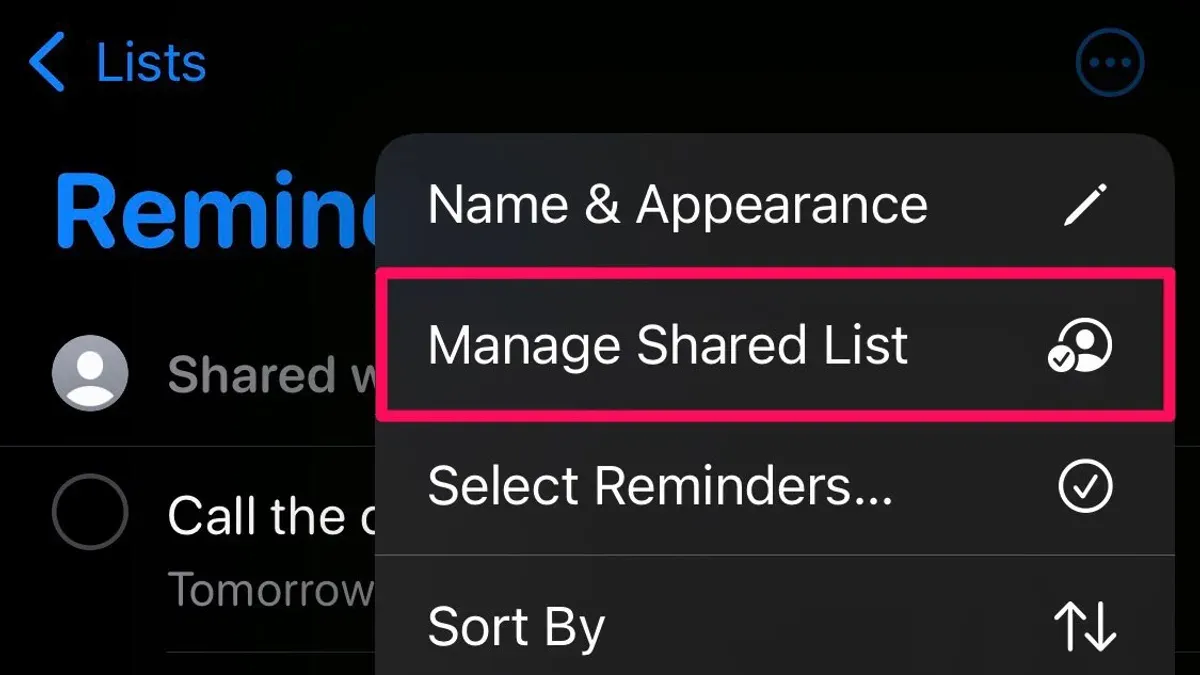
To change a collaborator's permission, click on their name or the permission label next to it. Select either "Can Edit" to allow them to add, modify, or delete reminders, or "View Only" if you want them to see the list without making changes. For example, giving "Can Edit" permission is useful in group projects where everyone needs to update tasks, while "View Only" works well for supervisors tracking progress.
If you need to remove a collaborator, click the small “x” or Remove button next to their name. This immediately revokes their access to the list. It’s a good practice to review collaborators regularly to keep the list secure and ensure only relevant people have access.
Managing permissions thoughtfully helps avoid accidental changes or confusion. For instance, in a shared grocery list, everyone might have edit rights, but in a work deadline list, limiting edits to core team members reduces errors. Adjusting permissions based on collaboration needs keeps your shared Reminders organized and effective.
How to share a list in reminders when using multiple Apple IDs or devices
Sharing a Reminders list can become complicated if you or your collaborators use multiple Apple IDs or different devices. The Reminders app requires both you and your collaborators to be signed in with iCloud accounts to share lists successfully. If a recipient isn't using iCloud or has a different Apple ID, they won't receive the shared list until they accept the invitation on a device signed into that Apple ID.
Switching Apple IDs on your Mac to share a list should be done cautiously to avoid data loss. Always sign out of iCloud in System Settings before signing in with another Apple ID, and back up your reminders to prevent accidental overwrites. Once switched, you can share lists from the new Apple ID's iCloud account.
Here’s a step-by-step approach to share a list when managing multiple Apple IDs or devices:
- Sign out of iCloud on your Mac by opening System Settings > Apple ID > Overview > Sign Out. You should see a confirmation screen to keep a copy of your data locally.
- Sign in with the Apple ID you want to use for sharing. You should see your iCloud data load, including Reminders lists linked to that account.
- Open the Reminders app, select the list you want to share, then invite collaborators using the Share button. The invite will be sent to the Apple ID email addresses you enter.
- If sharing with family members or colleagues on different devices, remind them to accept the invitation promptly. Until they accept, the shared list won’t appear on their devices.
- If an invitee has multiple Apple IDs, confirm which Apple ID they use with iCloud on their device. They must accept the invitation on that specific account for the list to appear.
For example, a user who switched between a personal and a work Apple ID found that reminders shared from the work ID didn’t appear on their personal iPhone until they signed in to iCloud with the work Apple ID or accepted the invite on that account. This illustrates the importance of coordinating Apple ID usage between devices for seamless sharing.
How to troubleshoot sharing reminders list on Mac
If the Share button is missing or greyed out, first verify that your list is stored in iCloud and not on your Mac locally. Sharing is only available for iCloud-based lists. Also, check that you are signed in with the correct Apple ID in System Settings under Apple ID & iCloud.
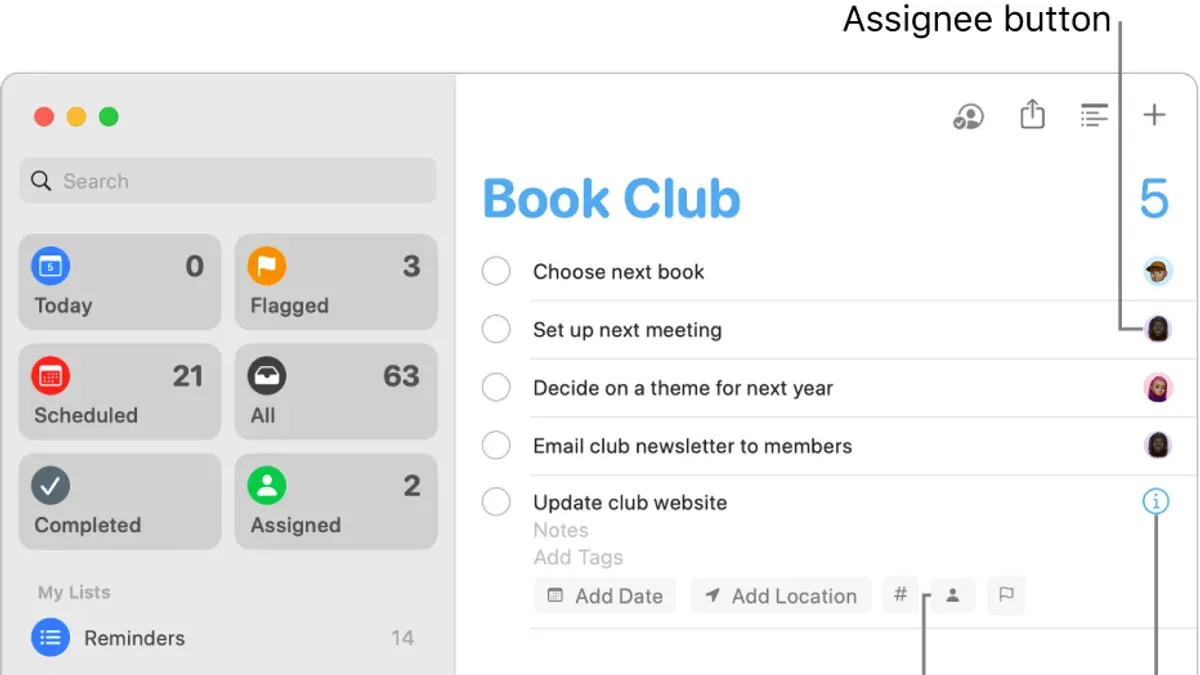
To fix iCloud syncing problems affecting shared lists, ensure your Mac is connected to the internet and iCloud Reminders syncing is enabled. If syncing stalls or changes don't appear on collaborators' devices, try toggling Reminders off and back on in System Settings > Apple ID > iCloud. This often resolves common syncing delays or failures.
Permission errors or collaborators not receiving invitations usually occur when invites are sent to the wrong Apple ID or get stuck in pending status. Ask collaborators to check their Invitations list in Reminders, and resend the invite if needed. Removing and re-adding collaborators can clear permission conflicts.
Refreshing Reminders and iCloud services can clear temporary glitches. To do this, follow these steps:
- Close the Reminders app completely by right-clicking its Dock icon and selecting Quit. You should no longer see Reminders in your Dock.
- Open System Settings, go to Apple ID, then iCloud, and turn off Reminders syncing. Confirm when prompted.
- Wait about 10 seconds, then turn Reminders syncing back on. You should see the syncing icon briefly indicating activity.
- Reopen Reminders and check if your shared lists and collaborators now appear correctly with expected permissions.
- If issues persist, restart your Mac. After rebooting, verify iCloud and Reminders settings again to confirm syncing is active.
Common error messages like "Unable to Share List" or "Invitation Not Sent" often resolve after these steps. Many users find that refreshing iCloud syncing and verifying Apple ID details leads to successful sharing and collaboration.
Frequently asked questions
Can I share a reminders list with non-Apple users on Mac?
No, sharing a Reminders list requires the other person to have an Apple ID and use an Apple device or iCloud on the web. Non-Apple users cannot access shared lists directly because the Reminders app relies on Apple’s ecosystem to sync and manage shared data.
How do I stop sharing a reminders list on my Mac?
To stop sharing a Reminders list, open the Reminders app and select the shared list. Click the Share button, then choose "Manage Shared List" or "Show People." From there, either remove individual collaborators by clicking the minus (–) button next to their name or select "Stop Sharing" to revoke all access. This will immediately end the shared access for everyone.
Why can’t I see the shared reminders list after accepting it?
If you don’t see a shared Reminders list after accepting an invitation, check that you are signed in to the same Apple ID on your Mac that received the invitation. Also, ensure that iCloud syncing for Reminders is enabled in System Preferences under your Apple ID settings. Sometimes, restarting the Reminders app or your Mac helps refresh and display the shared list.
Is it possible to share reminders lists with read-only access only?
Currently, the Reminders app does not support read-only sharing for lists. Anyone you share a list with can add, edit, or delete reminders. This is designed to facilitate collaboration, but it means you cannot restrict collaborators to view-only permissions.
What This Guide Does Not Cover
This guide does not cover sharing Reminders lists with non-iCloud accounts or syncing your reminders with third-party apps, as these fall outside the scope of the Reminders app on Mac. If you need to collaborate with users who do not have Apple IDs or require integration with other task management tools, you will need to explore alternative solutions or third-party apps designed for cross-platform sharing. Additionally, advanced enterprise-level collaboration features or managing reminders across managed devices in organizational environments are beyond the scope of this article.
To get the most out of sharing reminders on your Mac, the single most useful next step is to open the Reminders app now and try sharing a simple list with a trusted contact. Experiment with adjusting permissions to see how collaborators can add or edit tasks. Hands-on practice will help you become comfortable with the process and avoid common pitfalls like missing invitations or permission errors.
See also: How to Share a Calendar in the Calendar App on iPhone and Mac