How to Create a Grocery List in Reminders on Mac: Step-by-Step Guide
Discover how to build and manage a grocery list in Reminders on Mac for organized, shareable, and efficient shopping.

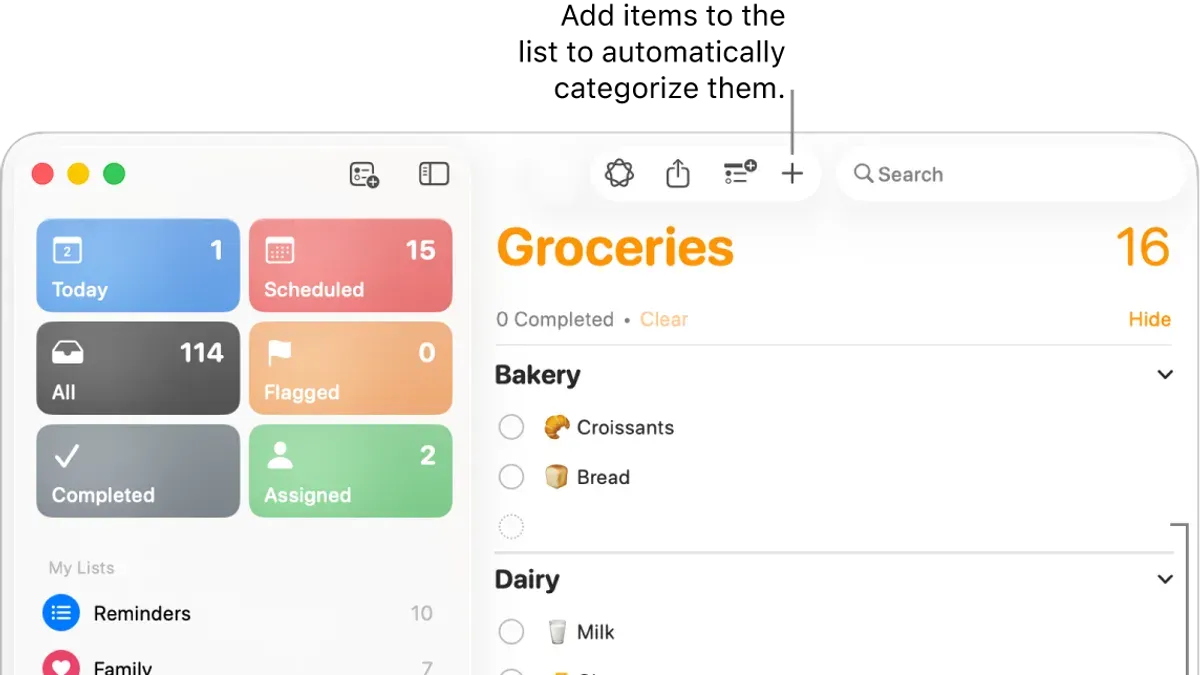
When you prepare for grocery shopping, it's common to jot down items on a scrap of paper or a simple note app, only to misplace it or forget key ingredients. Using the Reminders app on your Mac can help you build a structured, shareable grocery list that stays accessible and organized.
This guide explains how to create a grocery list in Reminders on Mac with a focus on practical features like smart lists, sharing options, and prioritization. You will learn step-by-step how to set up your grocery list, keep it orderly, and use Reminders’ tools to make shopping smoother and more efficient.
Key takeaways
- Create a dedicated grocery list by selecting New List in Reminders and naming it clearly.
- Add items quickly with keyboard shortcuts and group them using sections.
- Share your grocery list via the Share button to coordinate with family or roommates.
- Use priority flags and smart lists to highlight urgent or frequently bought items.
- Resolve syncing or notification issues by checking iCloud settings and app permissions.
Before You Start: What You Need to Use Reminders for Grocery Lists
To create and manage an effective grocery list using the Reminders app on your Mac, you need to ensure your system and account are properly set up. First, confirm that your Mac is running macOS Monterey or later, as these versions include the most advanced Reminders features like smart lists, tags, and enhanced sharing options. You can check your macOS version by clicking the Apple menu and selecting "About This Mac"; your version number should be 12 or higher.
Next, make sure you are signed in to your Mac with your Apple ID. This is essential because Reminders syncs your lists across all your Apple devices, such as iPhone and iPad, allowing you to access and update your grocery list wherever you go. To verify this, open System Settings and look under your Apple ID profile; if you are signed out, sign in with your credentials.
Finally, having a basic understanding of the Reminders app layout will help you navigate the process smoothly. You should be familiar with the concepts of lists (which group your reminders), individual reminders (your grocery items), and tags (keywords that help organize or filter your items). If you haven’t used Reminders much, spend a few minutes opening the app and exploring these elements before you begin your grocery list.
- Check your macOS version by clicking the Apple menu and selecting "About This Mac." You should see version 12 (Monterey) or later.
- Open System Settings and ensure you are signed in with your Apple ID; your name and email appear at the top of the sidebar if signed in.
- Launch the Reminders app and note the sidebar showing your lists, the main pane for reminders, and the toolbar with options for adding and organizing items.
Create a New Grocery List in Reminders
To start organizing your grocery shopping, you first need to create a dedicated list in the Reminders app. This allows you to keep your grocery items separate from other tasks and easily accessible.
- Open the Reminders app on your Mac. You’ll see your current lists on the left sidebar.
- Click the New List button, usually marked with a plus sign (+) at the bottom of the sidebar. A dialog box will appear prompting you to name your list.
- Enter a name such as Grocery List or any preferred name that clearly identifies the list’s purpose. This helps keep your lists organized.
- Choose a color by clicking the color dot next to the list name field. Assigning a distinct color makes the list easy to spot among others.
- Optionally, click the icon button to select an emoji or icon to visually represent your grocery list for quick identification.
- Click Create to finalize the list. Your new grocery list will now appear in the sidebar with the chosen color and icon.
Reminders offers two types of lists: standard lists and smart lists. Standard lists are manually created and contain only the items you add. Smart lists, on the other hand, automatically gather reminders based on criteria you set, such as tags, dates, or priorities. For a grocery list, a standard list is usually best because it keeps all your shopping items in one place without mixing other tasks.
| Feature | Standard List | Smart List |
|---|---|---|
| Creation | Manual, with custom name and color | Automatic, based on filters |
| Content | Only items you add to it | Aggregates items from other lists matching criteria |
| Best use | Focused lists like grocery or errands | Overview of reminders by priority, tag, or date |
By following these steps, you’ll have a clean, dedicated grocery list ready to add items and organize your shopping efficiently.
Add and Organize Grocery Items Efficiently
Start by adding each grocery item with a clear, specific name. For example, instead of just "milk," enter "2% milk" to avoid confusion while shopping. To add details like quantity or brand preference, use subtasks or notes attached to the main item. For instance, under "bananas," add subtasks for "6 bananas" to specify exactly how many you need.
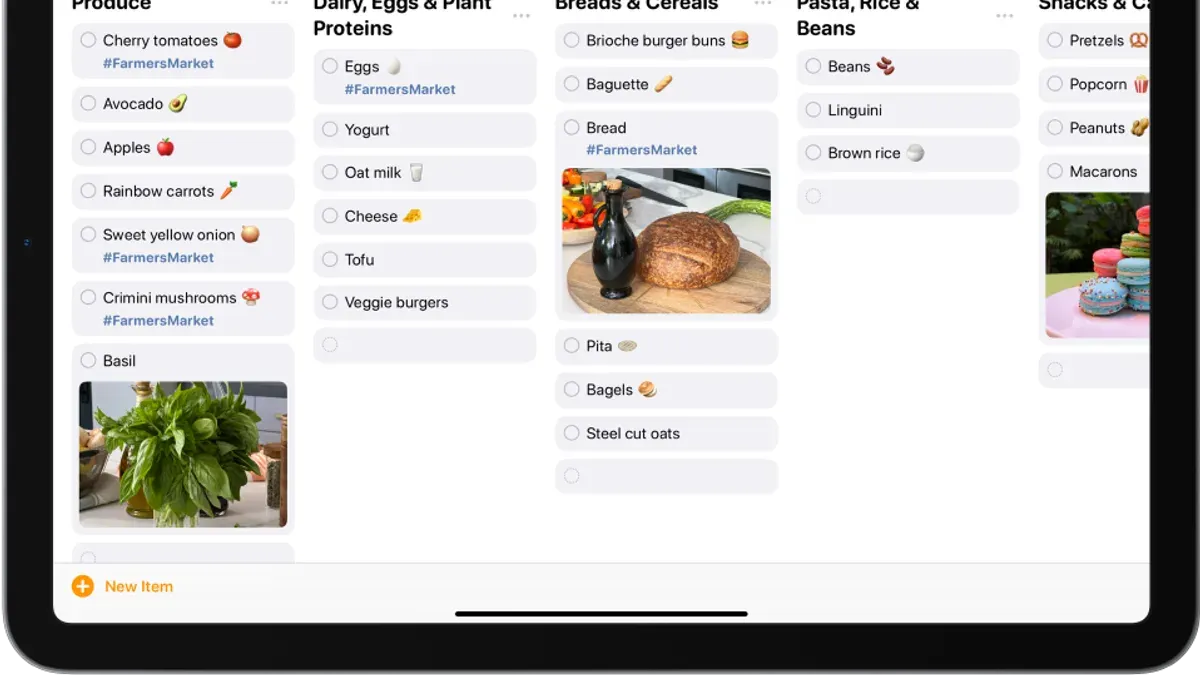
- Click the + button or press Return to add a new item to your grocery list. You should see the item appear immediately.
- Right-click the item and select "Add Subtask" to specify quantities or details such as "1 dozen" or "organic brand." The subtask will nest under the main item.
- Use tags to group items by category. Type a hashtag followed by the category name (e.g., #produce, #dairy) in the notes or directly in the item title. Tagged items will be easier to filter and manage.
- Set priority levels by right-clicking an item, choosing "Priority," and selecting High, Medium, or Low. For example, set "eggs" to High priority if you need them urgently. The priority icon appears next to the item.
When items are tagged and prioritized, your list becomes more organized and actionable. Compare a list with categories like #produce and #bakery against one without tags: the tagged list allows quick filtering and focused shopping trips. Priorities help you spot must-buy items at a glance, preventing missed essentials.
Share Your Grocery List with Family or Roommates
Sharing your grocery list in Reminders allows multiple people to collaborate, making shopping more efficient. You can invite others using their Apple ID email addresses to have full access to add, edit, or check off items. This way, everyone involved stays updated in real time without confusion or overlapping efforts.
- Open your grocery list in Reminders and click the share button (a silhouette with a plus sign) at the top right. A sharing popup will appear.
- Enter the Apple ID email addresses of up to two people you want to share the list with. As you add each, you’ll see their contact appear under "Participants."
- Send the invitation. The invited collaborators receive a notification and can accept to gain access. Once accepted, all participants can add, delete, or mark items as complete.
- To avoid duplicate entries, agree with collaborators on a clear naming convention for items and check items off promptly after purchase.
- You can see who made changes by tapping the info icon next to each item, showing recent edits and who made them.
For example, if you share with two roommates, all three of you can add needed groceries as they run out, and check off items when picked up. This keeps the list current and eliminates confusion over who bought what. Be mindful that everyone with access can make changes, so coordination is key to prevent accidental deletions or duplicate entries.
Use Reminders Features to Make Shopping Easier
Reminders offers advanced features that help you stay on top of your grocery shopping with minimal effort. One powerful tool is location-based reminders. For example, you can set a reminder to alert you when you arrive at your favorite grocery store, ensuring you never forget essential items. To do this, choose an item in your grocery list, click the info icon, enable “Remind me at a location,” then enter the store’s address. When you reach that location, your Mac or iPhone will notify you.
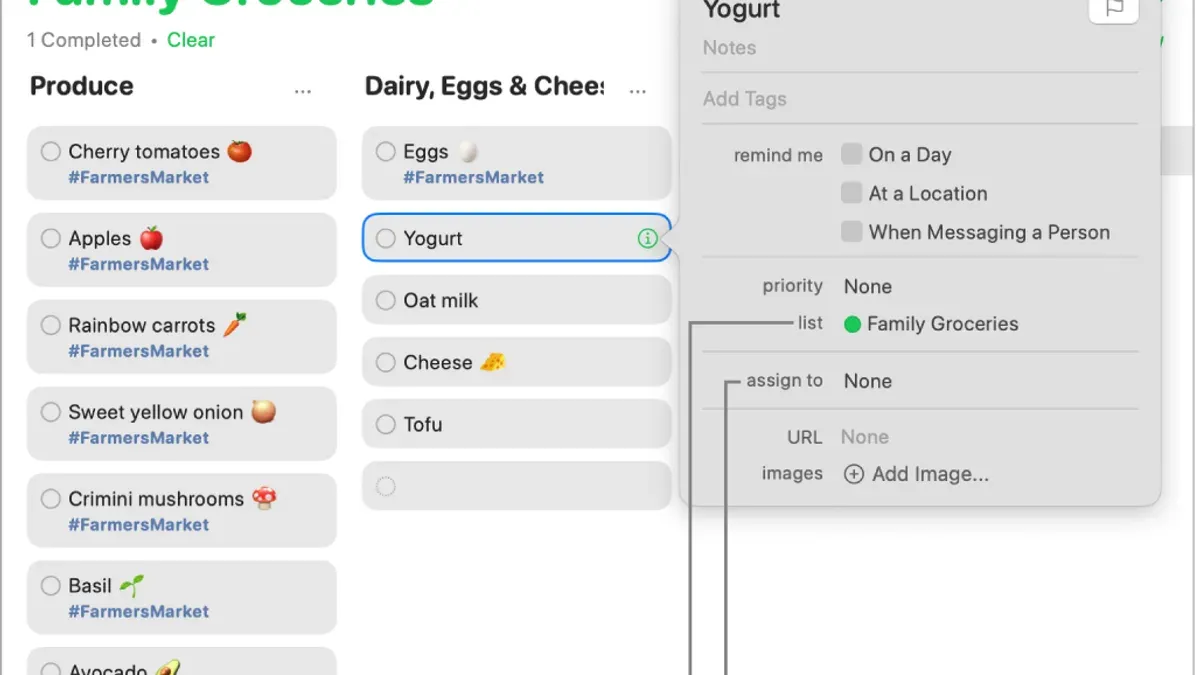
Siri also speeds up adding items. Simply say, “Hey Siri, add milk to my grocery list.” This lets you add items hands-free, perfect when you’re busy or on the go. You’ll see the new item appear instantly in your designated grocery list.
Notifications are crucial for urgent or sale items. Mark these items with high priority or add a custom notification time to receive alerts before shopping. This way, you won’t miss limited-time offers or last-minute needs.
Finally, smart lists can automatically gather items tagged as groceries across multiple lists. To create a smart list, click “New Smart List,” set the filter to include items tagged with “grocery,” and choose sorting preferences. This creates a dynamic list that updates as you tag new items, consolidating your grocery needs efficiently.
Troubleshoot Common Issues When Using Reminders for Grocery Lists
If your grocery list isn’t syncing across your Mac and other devices, first check that iCloud syncing for Reminders is enabled. Go to System Settings > Apple ID > iCloud, then ensure the toggle next to Reminders is on. After toggling it off and on again, wait a few minutes to see if the list updates on all devices.
To recover missing or accidentally deleted items, open the Reminders app, then click File > Show Recently Deleted. Items here can be restored within 30 days by selecting them and clicking Restore. If you don’t see your missing items, check your device’s backups or other shared users’ copies.
When multiple users edit the same grocery list, conflicts may occur. If you see duplicate or conflicting items, coordinate with collaborators to confirm changes. Refresh the list by closing and reopening Reminders or toggling iCloud syncing. Keeping communication clear minimizes these issues.
If the Reminders app crashes or behaves unexpectedly, try quitting and reopening the app. If problems persist, restart your Mac. You can also delete the Reminders cache by navigating to ~/Library/Containers/com.apple.reminders/ and removing its contents, then restarting the app. Always ensure your Mac software is up to date to reduce bugs.
Frequently asked questions
Can I use Reminders offline to manage my grocery list?
Yes, you can use Reminders offline to view, add, and check off items on your grocery list. Changes you make while offline will sync to your other devices once your Mac reconnects to the internet. However, sharing and collaborative updates require an active internet connection to sync properly.
How do I add items to my grocery list using Siri on Mac?
To add items with Siri, activate Siri by clicking the Siri icon or pressing the keyboard shortcut, then say something like "Add milk to my grocery list." Siri will recognize the list named "Grocery" if you have one, or prompt you to specify the list. This hands-free method helps you quickly update your list without opening the Reminders app.
Is it possible to categorize grocery items within a single Reminders list?
While Reminders does not offer folders inside a single list, you can use tags or emojis in item names to create visual categories. Another option is creating multiple lists for categories like "Produce" or "Dairy" and grouping them under a smart list using tags or keywords. This approach helps you organize your grocery items without cluttering one long list.
How do I recover a deleted grocery list or items in Reminders?
Deleted reminders and lists stay in the Recently Deleted folder for 30 days. Open Reminders, click File > Show Recently Deleted, then select the list or items you want to restore and click Recover. If you don’t see them there, they may be permanently deleted and cannot be recovered through the Reminders app.
What This Guide Does Not Cover
This article does not cover third-party grocery list apps or integration of Reminders with external shopping apps, which may offer specialized features like barcode scanning, price comparisons, or automated deals. If you need advanced inventory tracking or synchronization with online grocery stores, exploring dedicated grocery apps might be more suitable. Additionally, this guide focuses on the Reminders app available on Mac and does not delve into iOS or iPadOS-specific features that might differ slightly.
To keep your grocery list truly practical, the single most useful next step is to regularly update and review your shared list before heading to the store. This habit ensures everyone’s additions are accounted for and helps you prioritize items using Reminders’ flags or due dates, making your shopping trips faster and more efficient.
See also: How to Share a Calendar in the Calendar App on iPhone and Mac · How to Print a Monthly Calendar in the Calendar App and Other Tools