How to Use Smart Lists in Reminders on Mac: A Step-by-Step Guide
Discover how to create and customize smart lists in Reminders on Mac to manage your tasks efficiently and keep everything organized effortlessly.

Managing your tasks on a Mac can quickly become overwhelming if you rely on basic lists that need constant manual updating. Imagine having your Reminders app automatically organize tasks based on due dates, priority, or tags without extra effort. This article shows you how to use smart lists in Reminders on Mac to create dynamic, self-updating lists that make task management smoother and more efficient.
You'll learn what smart lists are, how they work, and how to create and customize them to fit your workflow. We'll also cover setting reminders, sharing lists for collaboration, syncing across devices, integrating with other tools, and troubleshooting common issues. By the end, you'll be able to harness smart lists to keep your tasks organized and accessible.
Key takeaways
- Smart lists automatically gather reminders based on set criteria like due dates or tags.
- Create a smart list by selecting File > New Smart List and defining rules in Reminders on Mac.
- Customize smart lists with multiple filters to focus on specific tasks or projects.
- Share smart lists with others for real-time collaboration through the Share button.
- Sync Reminders across Apple devices and access them on Windows via iCloud.com.
Before you start: What you need to use smart lists in Reminders on Mac
To use smart lists effectively in the Reminders app on your Mac, you need to ensure your system meets certain requirements. First, your Mac must run macOS Monterey or later, as these versions introduced and support the advanced smart list features. Older macOS versions lack the dynamic filtering and automation capabilities that smart lists offer.
Next, make sure you have iCloud enabled on your Mac. This setting allows your reminders and smart lists to sync seamlessly across all your Apple devices. Without iCloud, your lists will remain local to the Mac and won’t update across devices, limiting your productivity benefits.
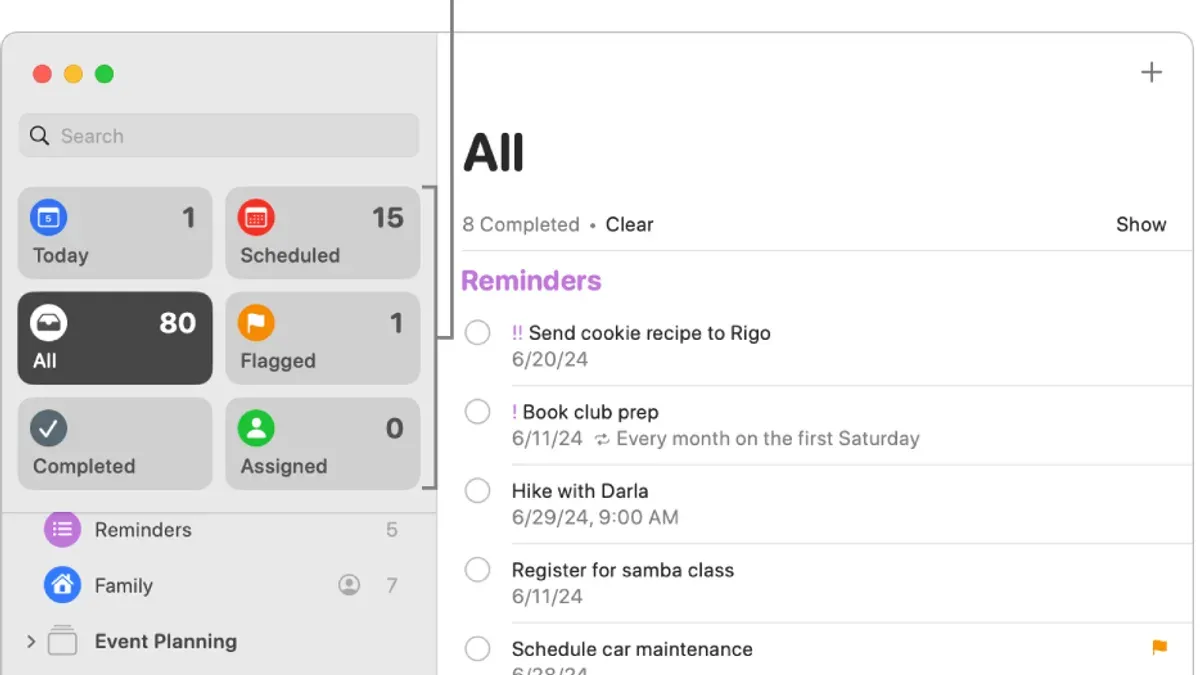
Understanding the Reminders app interface is also essential before creating smart lists. Familiarize yourself with the sidebar where your lists appear, the toolbar for adding new reminders, and the details pane where you set dates, priorities, and tags. Recognizing these components helps you navigate and customize smart lists with confidence.
- Check your Mac’s macOS version by clicking the Apple menu > About This Mac. Ensure it says macOS Monterey or later. If not, update your system via System Preferences > Software Update. You should see an option to upgrade if eligible.
- Enable iCloud for Reminders by opening System Preferences > Apple ID > iCloud. Confirm that the checkbox next to Reminders is selected. When enabled, your reminders sync automatically across devices.
- Open the Reminders app. You should see a sidebar on the left that lists your current reminder lists. The toolbar at the top includes a + button to add new reminders. Clicking a reminder shows its details on the right pane, where you can set dates, flags, locations, and tags.
What is a smart list in Reminders and how does it work?
A smart list in the Reminders app on Mac is a dynamic list that updates automatically based on criteria you set. Unlike a regular list where you manually add or remove reminders, a smart list gathers reminders that match specific filters such as due dates, tags, locations, or priority levels. This means the content of a smart list changes as your reminders change, without you having to manage it directly.
For example, if you create a smart list filtered to show only reminders due today, it will always display the tasks that have a due date matching the current day. This contrasts with a manual list where you would have to move or copy reminders into the list yourself. With a smart list, the app handles this automatically, saving you time and reducing the chance of missing important tasks.
Smart lists work by applying rules you define. These rules act like filters that sift through all your reminders and display only those that meet the criteria. You can combine multiple filters to create very specific smart lists, such as high-priority tasks tagged “Work” due this week.
The main difference lies in management: you maintain standard lists by editing their contents directly, whereas smart lists reflect changes you make to the reminders themselves, based on the filters you set.
How to make a smart list in Reminders on Mac
Creating a smart list in Reminders on your Mac lets you automatically organize tasks based on specific criteria you choose. Follow these steps to set up your own smart list from scratch.
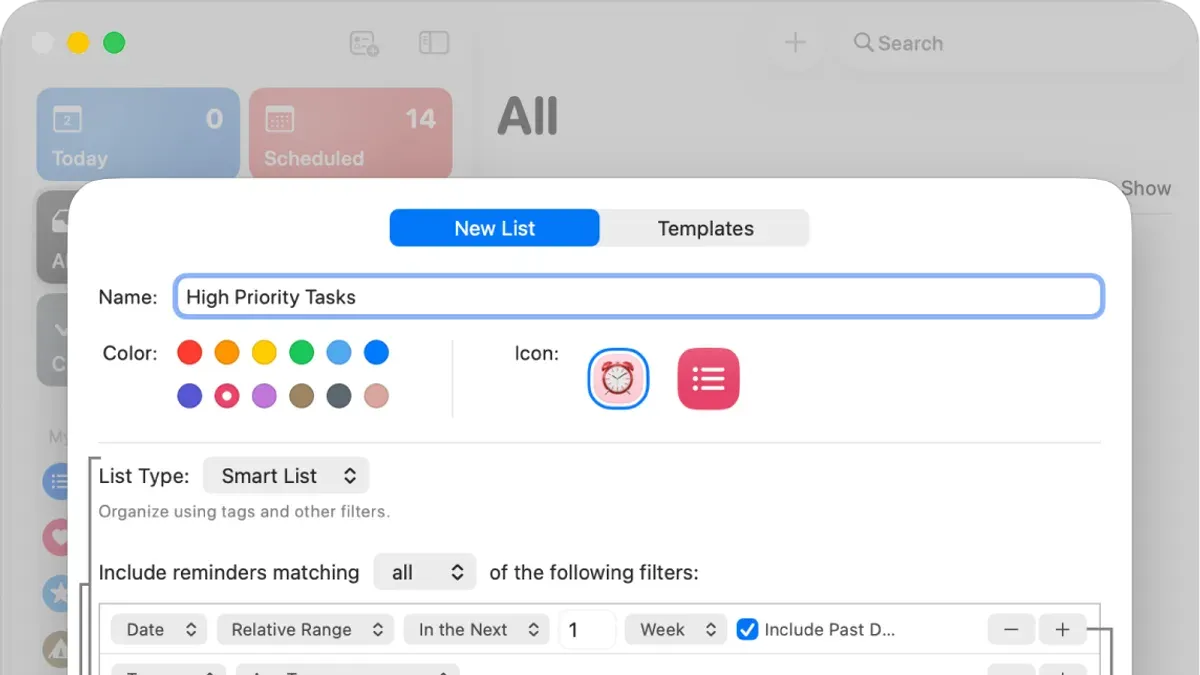
- Open the Reminders app on your Mac. In the sidebar, click the + button next to Smart Lists to create a new smart list. A new window will appear for setting up your list.
- Enter a name for your smart list, such as Urgent Tasks or Work Deadlines. Naming clearly helps you identify the list’s purpose later.
- Click Add Filter to start defining your criteria. You can filter by Due Date, Tags, Priority, or Location. For example, choose Due Date and set it to is today to show only tasks due today.
- To add more filters, click the + icon next to the existing filter. You might add a Priority filter set to High to narrow your list to urgent items.
- Once you’ve configured all filters, click Done. Your smart list will appear in the sidebar and dynamically update as reminders meet or stop meeting the criteria.
- Click your new smart list to view the filtered reminders. You can edit the filters anytime by right-clicking the smart list and selecting Edit Smart List.
For example, creating a smart list named High Priority This Week with filters for Priority is High and Due Date is within the next 7 days will keep your critical weekly tasks front and center without manual sorting.
How to set reminders on Mac and add them to smart lists
Creating reminders with detailed attributes allows smart lists to organize your tasks effectively. Start by opening the Reminders app and clicking the New Reminder button or pressing Command + N. Enter a clear title that describes your task, such as "Call Sarah about project update."
Next, add details like due date and time by clicking the Info (i) button. Here, you can set a specific date and time, add a location-based alert, or include notes with additional context. For example, setting a location reminder like "Remind me when I arrive at the office" can trigger tasks automatically.
To make reminders appear in smart lists, assign tags or set a priority level. You can add tags by typing hashtags in the reminder title or notes, such as #urgent or #client. Priorities range from None to High and are set via the Info panel. Smart lists filter reminders based on these attributes, so consistent tagging is key for automation.
Editing reminders is straightforward: double-click a reminder to update any detail. Organize your reminders by dragging them between lists or adjusting tags to ensure they fit the filters of your smart lists. Regularly review and update reminders to keep your task automation accurate and efficient.
How to share lists in Apple Reminders and collaborate using smart lists
You can share any regular reminders list directly with others, allowing them to view and edit tasks collaboratively. To do this, select the list you want to share, then click the share button (a person icon with a + sign). Enter the email addresses or Apple IDs of people you want to invite, and set their permissions to either "Can make changes" or "View only." Once shared, everyone can add, complete, or delete reminders, and changes sync automatically across devices.
Smart lists themselves cannot be shared directly because they are dynamic views built from filters applied to multiple lists. However, you can share the underlying lists that contribute reminders to a smart list, enabling collaboration on those tasks. This means if your smart list pulls reminders from several lists, you’ll need to share each relevant list individually for others to participate.
For effective collaboration, communicate which lists are shared and how they feed into smart lists. Encourage team members to use consistent tags or priorities to ensure tasks appear correctly in shared smart lists. Regularly refresh your Reminders app to keep all changes synchronized and avoid conflicts.
- Open the Reminders app and select the list to share. You should see the list’s contents displayed.
- Click the share button next to the list’s name. A sharing panel will open.
- Enter the email addresses or Apple IDs of the people you want to invite. You will see their names appear as you add them.
- Choose their permission level: "Can make changes" lets them edit tasks; "View only" restricts them to viewing.
- Click "Share" to send invitations. The list now appears in the invited users’ Reminders app with synchronization enabled.
- For collaboration on smart lists, identify all contributing lists and repeat this sharing process for each one. Confirm all collaborators have access to these lists.
- Advise collaborators to update reminders with consistent tags or priorities to maintain smart list accuracy and check for updates regularly.
How to use Apple Reminders app across devices, including Windows
Apple Reminders is designed to sync your tasks seamlessly across your Apple devices, but you can also access your reminders from non-Apple platforms like Windows. The easiest way to do this is through iCloud.com, which offers a web-based interface to view and manage your reminders.
- Open a web browser on your Windows PC and go to icloud.com.
- Sign in with your Apple ID credentials that you use on your Mac and iPhone.
- Click the Reminders app icon; your synced reminders and lists will load.
- From here, you can view, create, edit, and complete reminders, although some features like smart list creation or detailed priority settings are not available on the web interface.
- Changes you make on iCloud.com will sync back to your Apple devices as long as they have an active internet connection and iCloud Reminders sync enabled.
While the Windows experience covers the basics, it lacks some advanced features present on the Mac and iPhone apps, such as rich notification options and deep integration with other Apple services. For example, you can't create new smart lists or use Siri commands on Windows.
To keep reminders updated smoothly across devices, ensure your Mac and iPhone are connected to the internet and have iCloud Reminders enabled in System Preferences > Apple ID > iCloud and Settings > Apple ID > iCloud respectively. Regularly syncing prevents conflicts and missing tasks.
| Feature | Mac App | iPhone App | Windows via iCloud.com |
|---|---|---|---|
| Create/Edit Reminders | Yes | Yes | Yes |
| Create Smart Lists | Yes | No | No |
| Set Priorities and Tags | Yes | Yes | Limited |
| Notifications | Yes | Yes | No |
| Collaboration | Yes | Yes | Limited |
An example workflow to manage reminders across platforms could be creating and organizing your smart lists on your Mac, adding quick reminders on your iPhone throughout the day, and accessing or completing tasks on your Windows PC via iCloud.com when you're away from Apple devices.
How to integrate Reminders with Smartsheet for task management
Smartsheet is a powerful work execution platform that combines project management, automation, and collaboration in a spreadsheet-like interface. It supports reminders and alerts to keep teams on track. Integrating Reminders with Smartsheet enhances your ability to manage complex projects by combining Apple Reminders' personal task management with Smartsheet’s advanced tracking and reporting capabilities.
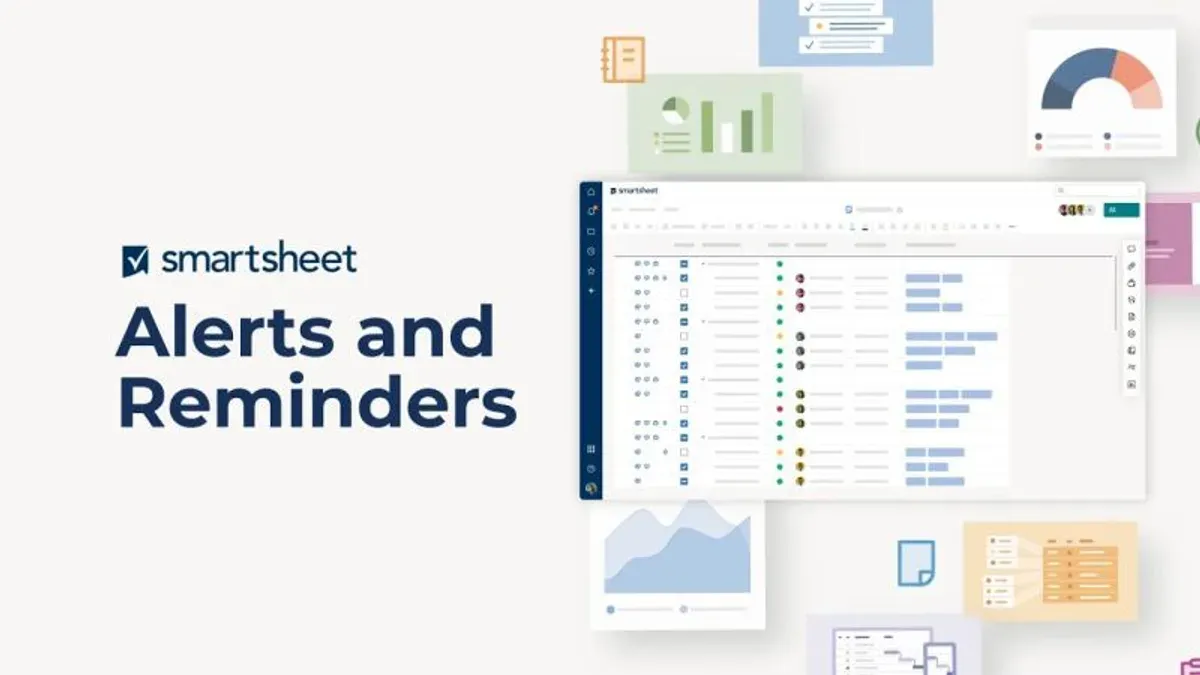
Since there is no direct sync between Reminders and Smartsheet, you can either export your tasks or manually create reminders within Smartsheet to align both tools.
Exporting and importing reminders
- Open the Reminders app on your Mac and select the list you want to export.
- Use File > Export or manually copy your task details into a CSV or text file.
- Log in to your Smartsheet account and open an appropriate project sheet or create a new one.
- Use the Import feature in Smartsheet to upload the CSV file or paste tasks into rows, ensuring columns like Task Name, Due Date, and Priority match your exported data.
- Confirm the import and adjust column types if necessary; you should now see your reminders as tasks in Smartsheet.
Creating reminders in Smartsheet
- Within Smartsheet, select a task row and click the Alerts & Actions menu.
- Choose “Set Reminder” and specify the reminder time and recipients if collaborating.
- Save the reminder; Smartsheet will notify you or your team based on the schedule.
- Use this alongside your Reminders app to keep personal and team tasks aligned, updating one tool based on changes in the other.
A practical workflow involves using Reminders for personal daily to-dos and Smartsheet for project-wide visibility, exporting tasks regularly or updating Smartsheet tasks as projects evolve. This hybrid approach leverages the strengths of both tools for better task management.
Troubleshooting common issues with smart lists in Reminders on Mac
If your smart list is not updating or showing incorrect reminders, the first thing to check is the filter criteria. Incorrect or missing filters often cause unexpected results. For example, if your smart list is set to show reminders due today but the filter uses a different date range, tasks won’t appear as expected. Verify each filter by opening the smart list’s settings and reviewing all conditions carefully.
Sync issues between devices can also affect smart lists. If reminders don’t appear consistently across your Mac, iPhone, or iPad, ensure iCloud syncing is enabled and stable on all devices. Go to System Preferences > Apple ID > iCloud and confirm that Reminders is checked. Sometimes signing out of iCloud and signing back in resolves persistent sync errors.
Common error messages like “Could not update reminders” typically indicate connectivity problems or corrupted data. To fix this, restart the Reminders app and your Mac. If errors continue, rebuild the smart list by deleting and recreating it with the correct filters.
- Open the smart list and click the filter icon to review all active filters. You should see reminders that meet every condition listed.
- Check System Preferences > Apple ID > iCloud and confirm Reminders syncing is enabled. You should see a checkmark next to Reminders.
- Quit the Reminders app, then reopen it. The smart list should refresh and display up-to-date reminders.
- If syncing issues persist, sign out of iCloud on your Mac and sign back in. After signing in, verify that your reminders sync across all devices.
- If the smart list still shows incorrect reminders, delete it and create a new one with the correct filters. The new smart list should dynamically update without errors.
Frequently asked questions
What is an apple reminders smart list?
An Apple Reminders smart list is a dynamic collection of reminders that automatically updates based on criteria you set, such as tags, dates, or priorities. Instead of manually sorting tasks, the smart list filters reminders matching your rules, helping you focus on specific categories or deadlines without extra effort.
How to make a list in reminders?
To create a list in Reminders on your Mac, open the Reminders app and click the File menu, then select New List. Name your list, choose a color or icon for easy identification, and it will appear in the sidebar. You can now add reminders directly into this list for organized task management.
How to add reminders in smartsheet?
In Smartsheet, reminders are added by setting automated alerts on tasks or rows. Select the row you want to track, click the Alerts & Actions tab, and choose Set Reminder. Specify the recipients and timing to receive notifications about approaching deadlines or task updates.
How to use apple reminders on windows?
Apple Reminders is not natively available on Windows, but you can access your reminders through iCloud.com. Sign in to your Apple ID at iCloud.com, then open the Reminders web app to view, create, or edit your tasks, which sync across your Apple devices.
How to set reminders in smartsheet?
To set reminders in Smartsheet, open the sheet containing your tasks and go to Automation > Manage Workflows. Create a new workflow with a trigger based on dates or changes, then add an action to send a reminder notification to specified collaborators or yourself.
What This Guide Does Not Cover
This guide does not cover advanced automation using third-party apps or scripting beyond the native Reminders app capabilities. If you rely heavily on tools like Shortcuts or third-party integrations for task automation, you'll need to explore those resources separately. Users without iCloud or those running outdated macOS versions may not have access to smart lists, as these features require syncing across devices and relatively recent software updates. Additionally, smart lists themselves cannot be shared directly; sharing works by sharing the underlying lists that feed into a smart list. This setup may limit collaboration scenarios where dynamic list sharing is necessary.
To get the most out of smart lists, focus first on organizing your existing reminders and creating clear, rule-based smart lists that automatically group tasks based on criteria like due dates, tags, or locations. Experiment with these settings to see how your reminders update dynamically. This hands-on approach will help you build a tailored system for task management that grows with your needs.
See also: How to Create a Grocery List in Reminders on Mac: Step-by-Step Guide