How to Fix Mixed Content Warning on Websites: A Step-by-Step Guide
This step-by-step guide shows how to fix mixed content warning on websites to maintain security and ensure all resources load over HTTPS.

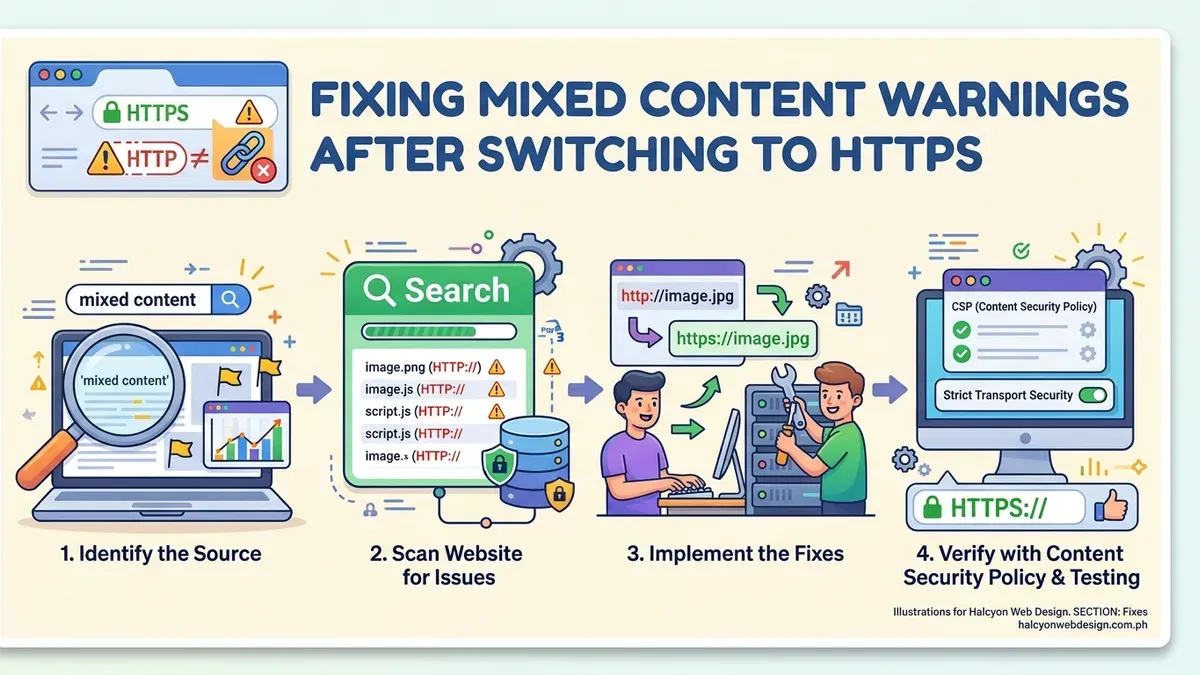
This article explains how to fix mixed content warning on websites through a practical, step-by-step approach tailored for webmasters and site administrators.
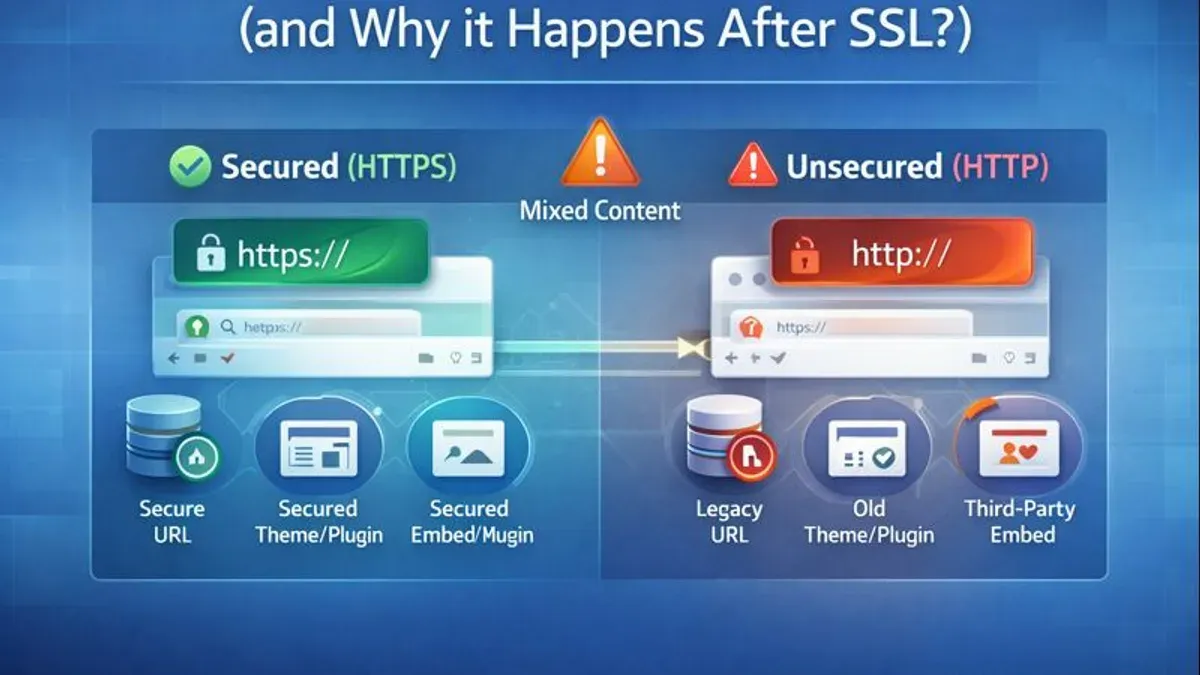
Mixed content warnings occur when a secure HTTPS webpage loads resources such as images, scripts, or stylesheets over an unsecured HTTP connection. Resolving these warnings is essential for maintaining site security, preserving user trust, and ensuring compliance with modern browser standards.
The guide covers identifying mixed content sources using browser developer tools, updating internal links from HTTP to HTTPS, and handling third-party content that often triggers these warnings. It also addresses CMS-specific configurations to enforce HTTPS and server-level techniques like redirects and security headers to prevent mixed content. Finally, testing and troubleshooting steps help confirm that all mixed content issues have been resolved effectively.
Before you start: What is needed to fix mixed content warnings
Fixing mixed content warnings requires a foundational understanding of HTTPS protocols and the role of SSL certificates in securing website communications. Access to the website's backend or content management system (CMS) is essential for making necessary updates. Additionally, utilizing diagnostic tools such as browser developer consoles and online mixed content scanners will help identify problematic elements.
Backing up website data before initiating changes is crucial to prevent data loss or site downtime. Reliable backup utilities include native CMS backup features like WordPress’s "Export" tool or third-party solutions such as UpdraftPlus and Duplicator.
Essential knowledge and access
- Confirm that the website has an active SSL certificate installed. Successful HTTPS access in a browser without security warnings indicates this is in place.Expected result: The website URL displays a padlock icon, and navigating to the site using https:// works without browser warnings.
- Gain administrative access to the website backend or CMS dashboard.Expected result: The ability to view and edit content, media, and settings related to URLs and security.
- Open the browser’s developer console (usually via F12 or right-click > Inspect) and navigate to the "Console" tab to check for mixed content warnings.Expected result: Warnings about blocked or insecure content are listed, highlighting HTTP resources on an HTTPS page.
- Use online scanning tools such as SSL Labs’ SSL Server Test or Why No Padlock to identify insecure content and certificate issues.Expected result: A report detailing insecure resources and potential fixes.
- Perform a full backup of website files and databases using CMS-integrated tools or external backup utilities.Expected result: A secure backup file stored locally or in cloud storage, ready for restoration if needed.
Tip: Taking screenshots of the browser console warnings can help track progress and verify resolution after fixes.
Identifying mixed content sources using browser tools
Locating the exact elements causing mixed content warnings is crucial for effective troubleshooting. Modern browsers provide built-in developer tools that display warnings for resources loaded over HTTP on HTTPS pages, enabling targeted fixes.
- Open the website in a modern browser such as Google Chrome or Mozilla Firefox, then access the developer tools. In Chrome, press F12 or right-click the page and select Inspect. In Firefox, press Ctrl+Shift+I (Windows/Linux) or Cmd+Option+I (Mac).
- Navigate to the Console tab within the developer tools. Here, mixed content warnings appear as messages indicating blocked or insecurely loaded resources. A typical warning reads: Mixed Content: The page at 'https://example.com' was loaded over HTTPS, but requested an insecure image 'http://example.com/image.jpg'. This request has been blocked; the content must be served over HTTPS.
- Click on the file or URL referenced in the warning to reveal the source code location where the insecure resource is embedded. This helps identify whether it originates from the site's own code or third-party content.
- Use the Network tab to filter requests by protocol. Applying a filter such as http or examining the Scheme column shows all HTTP requests, providing a comprehensive list of resources causing mixed content issues.
- Classify the mixed content as passive or active. Passive mixed content includes resources like images, audio, and video that do not alter page behavior. Active mixed content involves scripts, iframes, stylesheets, and other elements that can affect page execution or security.
- Understand the impact: browsers often block active mixed content by default to maintain security, which can break functionality. Passive mixed content is sometimes allowed but still exposes users to potential eavesdropping or tampering, and usually triggers warnings.
Worked example: On a test site loaded over HTTPS, the console shows a warning: Mixed Content: The page at 'https://testsite.com' was loaded over HTTPS, but requested an insecure script 'http://analytics.com/script.js'. This request has been blocked. Clicking the link reveals the HTML source referencing the HTTP script, pinpointing the source of the problem.
| Type of Mixed Content | Examples | Browser Behavior | Security Impact |
|---|---|---|---|
| Passive | Images, audio, video | Usually allowed with warnings | Exposes data to interception, lower risk |
| Active | Scripts, iframes, stylesheets | Blocked by browsers by default | Can modify page, high security risk |
Tip: Use the browser's filter options to isolate HTTP requests quickly, reducing time spent hunting down mixed content sources.
Updating internal website links from HTTP to HTTPS
To fully eliminate mixed content warnings, it is essential to systematically update all internal references from HTTP to HTTPS. This includes links embedded in HTML documents, CSS files, JavaScript resources, and within the backend templates or themes.
Begin with a comprehensive search and replace of all HTTP URLs across the website's codebase. This can be done manually for smaller sites or automated for larger ones.
- Perform a global search for "http://" in website files. Use a code editor or command-line tools like grep or findstr to locate all instances of HTTP URLs. When successful, the list of URLs should include every internal link that uses HTTP.
- Replace HTTP URLs with HTTPS equivalents. For example, use a command such as sed -i 's|http://example.com|https://example.com|g' to update links in bulk. After running this command, verify that all instances have been replaced by checking a sample of files.
- Address links in CSS and JavaScript files. Background images or AJAX calls may contain HTTP URLs. Updating these ensures all resource calls are secure and eliminates warnings caused by mixed content in assets other than HTML.
- Review and update hardcoded URLs in CMS templates or themes. Some themes or templates may contain absolute HTTP URLs embedded in their code. Editing these files directly or using the CMS’s theme editor to switch to HTTPS is necessary.
- Use CMS-specific tools or plugins to automate URL updates. Many content management systems offer plugins or built-in tools designed to find and replace URLs safely across the database and files. For example, WordPress users can employ plugins like "Better Search Replace" or "Velvet Blues Update URLs" to handle this process without manual file editing.
After completing these updates, site owners typically observe a significant improvement in site security status and a reduction in mixed content warnings reported by browsers. The site’s performance and user trust tend to improve since secure connections are enforced consistently.
Example search-and-replace command: sed -i 's|http://www.example.com|https://www.example.com|g' *.html *.css *.js — this command updates all HTTP links pointing to the domain in HTML, CSS, and JS files in the current directory.
Tip: Back up all files and database content before running bulk URL replacements to prevent accidental data loss.
Handling third-party content that causes mixed content warnings
Third-party resources such as fonts, scripts, images, and videos often cause mixed content warnings when they are loaded over HTTP instead of HTTPS. Identifying whether these external resources support HTTPS is the first step in resolving such issues.
- Verify HTTPS support for third-party resources. Access the URL of the external resource using HTTPS in a browser. If the resource loads without security warnings, HTTPS is supported. If it does not load or shows errors, HTTPS is likely unsupported.
- Replace HTTP URLs with HTTPS versions. Update the website’s source code or CMS settings to reference the HTTPS version of the resource. Successful replacement results in the resource loading securely without mixed content warnings.
- Host third-party resources locally when HTTPS is unsupported. Download the external resource and upload it to the website’s own server served via HTTPS. Update the website code to point to the local copy. This eliminates reliance on insecure external URLs.
- Use a Content Security Policy (CSP) to control mixed content loading. Implement CSP directives such as upgrade-insecure-requests or block-all-mixed-content in the server configuration or HTML headers. This instructs browsers to either automatically upgrade HTTP requests to HTTPS or block insecure content entirely, reducing mixed content risks.
Case study: A website using Google Fonts initially linked to HTTP-hosted font files, triggering mixed content warnings. By updating the links to the official HTTPS Google Fonts URLs, the warnings were resolved. For a custom script hosted externally without HTTPS support, the webmaster hosted the script locally and updated the references, eliminating the warning.
CSP example snippet:
| Directive | Purpose |
|---|---|
| Content-Security-Policy: upgrade-insecure-requests; | Automatically upgrades all HTTP resource requests to HTTPS. |
| Content-Security-Policy: block-all-mixed-content; | Blocks all mixed content from loading. |
Tip: When hosting third-party resources locally, ensure they are kept up to date to avoid security vulnerabilities.
Configuring Content Management Systems to enforce HTTPS
Most popular Content Management Systems (CMS) offer built-in options or extensions to enforce HTTPS, preventing mixed content warnings by redirecting or rewriting URLs. Leveraging these tools simplifies the process and ensures consistent use of secure connections across the site.
Enabling HTTPS enforcement settings
- Access the CMS admin dashboard and navigate to the general or site settings section (e.g., "Settings > General" in WordPress). Change the site URL and home URL from http:// to https://. This step tells the CMS to use HTTPS as the default for generated links. Upon saving, the CMS should use HTTPS URLs site-wide.
- For platforms like Joomla, go to "System > Global Configuration > Server" and enable the "Force HTTPS" option. After saving, the CMS will redirect all frontend requests to HTTPS, reducing mixed content risk.
- In Drupal, enable the "Secure Pages" module or configure the "Trusted Host Settings" to enforce HTTPS URLs on specific pages or site-wide. The module settings allow specifying which pages require HTTPS, providing flexible control.
Using plugins and extensions to fix mixed content automatically
- Install a dedicated mixed content fixer plugin or extension designed for the CMS. For example, WordPress users can install the "Really Simple SSL" plugin. After activating it, the plugin automatically detects and rewrites insecure URLs in content, scripts, and stylesheets to HTTPS.
- Configure the plugin by accessing its settings page, typically found under "Settings > SSL" or a similar menu. Enable options such as "Enable mixed content fixer" and "Redirect to HTTPS". When configured correctly, the plugin outputs console messages confirming active rewriting of HTTP resources.
- For Joomla, extensions like "JoomSEF" or "SSL Redirect" can manage mixed content by rewriting URLs and forcing HTTPS. After installation, ensure the extension is enabled and set to enforce HTTPS site-wide. The admin panel should indicate the extension's active status.
Updating media and asset URLs within CMS databases
- Perform a database search-and-replace to update all media and asset URLs from http:// to https://. In WordPress, plugins like "Better Search Replace" allow running this operation safely from the admin interface. Enter http://yourdomain.com as the search term and https://yourdomain.com as the replacement.
- After running the replacement, verify the affected rows count to ensure URLs were updated. For example, the plugin may report updating 150 rows in the wp_posts and wp_postmeta tables.
- Alternatively, advanced users can run SQL queries directly, such as UPDATE wp_posts SET post_content = REPLACE(post_content, 'http://yourdomain.com', 'https://yourdomain.com'); before and after running the query, a SELECT statement can show the changes made.
Tip: Always back up the CMS database before performing mass search-and-replace operations to prevent accidental data loss.
Implementing server-level redirects and headers to prevent mixed content
Server-level configurations play a crucial role in enforcing HTTPS and minimizing mixed content warnings by ensuring all resources load securely. The two primary methods are setting up 301 redirects from HTTP to HTTPS and adding security headers such as Strict-Transport-Security (HSTS). Additionally, configuring web server rules to serve assets consistently over HTTPS helps prevent accidental insecure resource delivery.
Setting up 301 redirects from HTTP to HTTPS
Redirects instruct browsers and search engines to request the HTTPS version of a site, reducing the chance of mixed content. A permanent 301 redirect signals that the HTTP URL has moved permanently to HTTPS.
- Access the server configuration files or control panel where redirects can be managed.
- For an Apache server, add the following to the .htaccess file or the site’s virtual host configuration:
- For Nginx, insert this directive into the server block that listens on port 80:
- Save the changes and reload or restart the web server to apply them.
- Visit the HTTP version of the site; it should automatically redirect to the HTTPS URL.
| Nginx 301 Redirect Example |
|---|
| server { listen 80; server_name example.com www.example.com; return 301 https://$host$request_uri; } |
| Apache 301 Redirect Example |
|---|
| <IfModule mod_rewrite.c> RewriteEngine On RewriteCond %{HTTPS} off RewriteRule ^(.*)$ https://%{HTTP_HOST}/$1 [R=301,L] </IfModule> |
Adding Strict-Transport-Security (HSTS) headers
HSTS instructs browsers to only connect via HTTPS for a specified time, preventing users from inadvertently loading insecure HTTP resources and reducing mixed content issues.
- Add the HSTS header to the server configuration to enforce HTTPS:
- Apache example to add in the .htaccess or virtual host:
- Nginx example to add inside the HTTPS server block:
- Reload the server to apply headers.
- Verify the header is present using browser developer tools or online header checkers.
| Nginx HSTS Header Example |
|---|
| add_header Strict-Transport-Security "max-age=31536000; includeSubDomains; preload" always; |
| Apache HSTS Header Example |
|---|
| Header always set Strict-Transport-Security "max-age=31536000; includeSubDomains; preload" |
Tip: Setting the max-age value to at least one year (31536000 seconds) is common practice to ensure long-term HTTPS enforcement.
Configuring web server rules for asset delivery
Beyond redirects and headers, fine-tuning server rules can prevent serving assets over HTTP. For example, forcing HTTPS on all resource requests or restricting mixed protocol content.
- Ensure all static file requests (images, scripts, stylesheets) are served via HTTPS URLs.
- Use server rewrites to redirect HTTP asset requests to their HTTPS counterparts.
- Audit CDN or proxy configurations to guarantee HTTPS origin fetch and delivery.
These configurations complement redirects and HSTS by covering edge cases where mixed content might still occur due to direct HTTP asset calls.
Testing the site after fixes and validating mixed content resolution
After implementing changes to resolve mixed content warnings, thorough testing ensures that the site no longer triggers such issues and maintains secure, consistent functionality across browsers.

- Open the website in a modern web browser such as Google Chrome, Mozilla Firefox, or Microsoft Edge. Use the developer console (Ctrl+Shift+I or Cmd+Option+I) and check the Console tab for any mixed content warnings. A successful fix is indicated by the absence of warnings related to HTTP resources.
- Use online SSL testing tools like Qualys SSL Labs (https://www.ssllabs.com/ssltest/) by entering the website URL. The test results should show a secure configuration with no mixed content issues flagged. Screenshots of the "No issues found" or "A+ rating" pages can document this status.
- Perform cross-browser testing by repeating the developer console check in multiple browsers. Confirm that no mixed content warnings appear in each browser’s console to ensure consistent secure loading of resources.
- Navigate through various pages and functionalities of the website to verify that all assets (images, scripts, stylesheets, videos) load correctly without security warnings or broken elements. Pay special attention to pages previously identified with mixed content sources.
- Clear the browser cache or test in an incognito/private window to ensure that cached HTTP resources are not masking unresolved mixed content.
- Optionally, use automated website scanning tools like Mozilla Observatory or online mixed content checkers to identify any residual insecure resource calls that might have been missed during manual inspection.
Tip: Document the results from both browser console checks and online SSL scan screenshots for future reference and validation during ongoing website maintenance.
Troubleshooting common mixed content problems
After applying standard fixes, some mixed content warnings may persist due to caching, dynamic content, or CMS/plugin conflicts. Addressing these requires targeted troubleshooting steps.
Clearing cached content causing false positives
Cached resources can cause browsers or security scanners to report mixed content even after fixes. Clearing caches at multiple levels helps eliminate false positives.
- Clear the browser cache: Access browser settings, find the "Clear browsing data" option, and clear cached images and files. Upon reload, the site should no longer show the previous mixed content warnings.
- Clear server-side cache: If using caching plugins (e.g., WP Super Cache, W3 Total Cache) or CDN services (e.g., Cloudflare), purge all cached content to serve updated HTTPS resources. After purging, verify that the warnings are gone by reloading the affected pages.
- Clear CMS object cache: For platforms using object caching (Redis, Memcached), flush these caches through the CMS dashboard or server console. Successful clearing typically results in the disappearance of persistent warnings.
Example log: Before cache clearing, browser console shows "Mixed Content: The page at 'https://example.com' was loaded over HTTPS, but requested an insecure image 'http://example.com/image.jpg'." After clearing caches, this message no longer appears.
Identifying dynamic or script-injected mixed content
Scripts or third-party widgets can inject HTTP resources dynamically after page load, evading static scans.
- Use browser developer tools’ Network tab to monitor all resource requests during page load and user interaction. Look for any HTTP requests appearing after initial page load.
- Inspect JavaScript files for hardcoded HTTP URLs or calls to external resources over HTTP. Replace with HTTPS URLs or protocol-relative URLs.
- Disable or isolate third-party scripts one by one to identify the source of injected mixed content. Once identified, update or remove the problematic script.
Resolving CMS or plugin conflicts that reintroduce HTTP links
Some CMS plugins or themes may override HTTPS settings or insert HTTP links, causing recurrent mixed content warnings.
- Review all active plugins and themes for known issues related to URL handling, especially those managing media, SEO, or caching.
- Temporarily deactivate plugins in a staging environment, then test the site for mixed content warnings after each deactivation. The plugin that reintroduces HTTP links will cause warnings to reappear.
- Update the identified plugins to their latest versions or consult plugin documentation for HTTPS compatibility settings.
- If no update is available, consider replacing the plugin with alternatives or implementing manual fixes such as URL rewriting filters.
Tip: Maintain a staging or test environment to safely troubleshoot plugin conflicts without impacting the live site.
Further reading
- How to Set Up Private DNS on Android for Better Privacy
- How to Set Up Hide My Email on Apple Devices
- How to Install Fail2Ban on Linux
- How to Harden Your Ubuntu Server
Frequently asked questions
What is the difference between active and passive mixed content?
Active mixed content refers to insecure resources like scripts, iframes, or stylesheets loaded over HTTP on an HTTPS page, which can alter page behavior and pose security risks. Passive mixed content includes images, videos, or audio files loaded via HTTP, generally considered less dangerous as they do not directly affect code execution but still compromise security and user trust.
Can mixed content warnings affect SEO rankings?
Search engines favor fully secure HTTPS sites, so mixed content warnings can undermine a site's perceived security and user experience, potentially impacting rankings. While not an explicit ranking factor, unresolved mixed content may lead to search engines devaluing the site or limiting indexing of certain pages.
How do I find mixed content warnings if I don’t see them in the browser?
Use developer tools in browsers like Chrome or Firefox, checking the Console tab for mixed content messages even if no visible warning appears. Additionally, online scanners such as SSL Labs or security audit tools can detect insecure resources embedded within pages.
Is it safe to ignore mixed content warnings on a website?
Ignoring mixed content warnings is not recommended as it exposes visitors to security vulnerabilities and can erode trust. Some browsers block active mixed content by default, causing functionality issues, so resolving these warnings ensures consistent site behavior and secure user connections.
What this guide does not cover
This guide focuses on mixed content warnings related to website front-end resources such as images, scripts, and stylesheets. It does not cover server-side security issues, in-depth certificate management, or advanced HTTPS configurations like OCSP stapling or HSTS preloading. Organizations with complex infrastructure, including load balancers and CDN configurations, should consult specialized security professionals or dedicated server administrators.
For those managing e-commerce platforms or handling sensitive user data, comprehensive security audits and certificate lifecycle management tools are recommended beyond the scope of this article.
To effectively resolve mixed content warnings, the most practical next step is to methodically audit all external and internal resource URLs using browser developer tools and CMS settings, ensuring every asset is loaded securely via HTTPS. This approach minimizes risk without requiring costly infrastructure changes.