Your Step-by-Step Checklist for Moving from Clever to Apple School Manager
This checklist guides you through moving from Clever to Apple School Manager, covering key steps for a seamless district data and device management migration.

Short answer: Moving from Clever to Apple School Manager requires a clear understanding of how user identities, rostering data, and device management differ between the two platforms. This moving from Clever to Apple School Manager checklist highlights the key steps you need to follow to avoid common migration pitfalls and ensure a seamless transition.
This article covers the unique challenges of transferring your district’s data accurately, setting up Apple School Manager properly, and managing device enrollment differences. You’ll get a practical, no-nonsense roadmap that zeroes in on explicit migration scenarios and traps few guides mention. By the end, you’ll know exactly what to do to keep your technology infrastructure running smoothly during and after the switch.
What Is Apple School Manager and Why Move from Clever?
Apple School Manager (ASM) is a web-based portal that centralizes the management of Apple devices, apps, and accounts within a school or district. It integrates directly with Apple services like Device Enrollment Program (DEP) and Volume Purchase Program (VPP), enabling streamlined device enrollment and app licensing tied specifically to Apple hardware. In contrast, Clever serves primarily as an identity and rostering provider that supports multiple platforms and applications, acting as a connector between student information systems (SIS) and various edtech tools.
Schools or districts often switch from Clever to ASM to gain tighter control over their Apple ecosystem. This includes direct management of device enrollment, automated app deployment, and simplified user account provisioning using Managed Apple IDs. For example, a district with 5,000 iPads might move to ASM to automate setup and ensure compliance with app licensing restrictions, tasks that Clever can’t fully handle within the Apple environment.
Key differences include ASM’s exclusive focus on Apple device lifecycle management versus Clever’s broader but less device-specific rostering and identity services. ASM’s user management revolves around Managed Apple IDs with granular role assignments, while Clever links existing IDs across platforms. Districts choosing ASM often prioritize device deployment efficiency and tighter integration with Apple services at the expense of cross-platform flexibility.
| Feature | Clever | Apple School Manager |
|---|---|---|
| Primary Role | Multi-platform identity and rostering hub | Apple device and account management portal |
| Device Enrollment | Limited, third-party dependent | Automated via DEP integration |
| User Management | Federated IDs, multiple platforms | Managed Apple IDs, Apple services only |
| App Licensing | Indirect, via app portals | Direct Volume Purchase Program integration |
| Ideal For | Districts with diverse platforms | Apple-centric device fleets |
How Does Data Transfer Differ Between Clever and Apple School Manager?
Clever and Apple School Manager (ASM) use fundamentally different data models and APIs for rostering and user management. Clever relies on its API to sync user, class, and school data from Student Information Systems (SIS) into its platform, supporting multiple third-party apps. ASM, by contrast, imports data through CSV templates or direct SIS integration via SFTP using the Ed-Fi standard, focusing exclusively on Apple device management and account provisioning.
Mapping fields from Clever exports to ASM templates requires careful alignment. For example, Clever’s user CSV includes fields like username, email, and role, while ASM expects Managed Apple ID, Location, and Class Identifiers. Usernames often convert into Managed Apple IDs by appending your institution’s domain, but not all Clever roles have direct ASM equivalents, risking data loss or misclassification.
Unlike Clever’s API-driven live sync, ASM’s import process is batch-based. Before migration, you must audit your Clever data for empty or inconsistent fields and fix them to avoid import errors. For instance, a missing Student ID in Clever can cause ASM import failures or orphaned accounts.
Example: Export your Clever users CSV and locate the username column. In ASM’s user import template, enter these usernames as Managed Apple IDs, appending your school's domain (e.g., [email protected]). Then map class rosters by matching Clever’s class_id to ASM’s Class Identifiers. Confirm no fields are blank, especially Student ID and Role, to prevent issues.
- Export user and roster data from Clever via its Admin Console.
- Compare and map Clever fields to Apple School Manager CSV import templates.
- Clean data: fill missing Student IDs, standardize usernames, and verify roles.
- Convert usernames to Managed Apple IDs by appending your domain.
- Upload CSV files to ASM and review import error reports carefully.
What Is the Step-by-Step Process to Set Up Apple School Manager After Migration?
Once your data imports into Apple School Manager, start by verifying user accounts under Accounts > Users. Check for mismatched or duplicated entries, correcting errors before proceeding. Confirm classes and courses align with your district’s structure in the Classes tab, adjusting as needed to reflect real schedules.
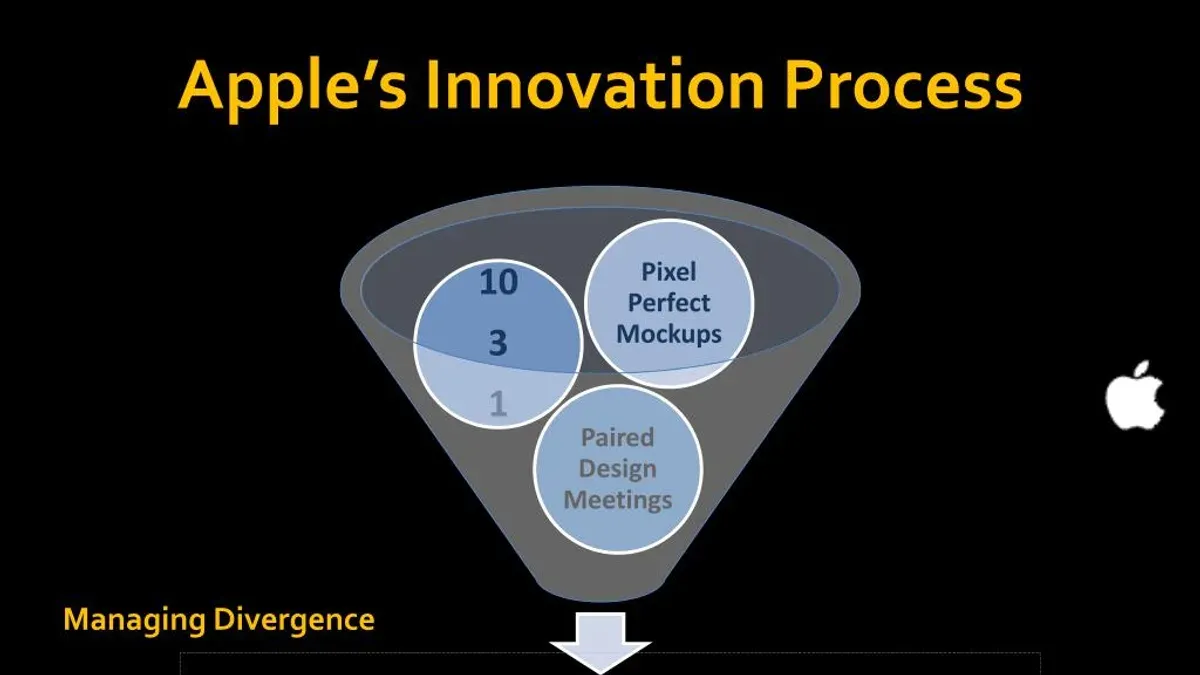
Next, understand Managed Apple IDs versus standard Apple IDs. Managed Apple IDs are created and controlled by your organization, enabling access to Apple services under your domain. Assign these IDs to students and staff to ensure secure, consistent access to learning tools without personal Apple ID dependencies.
Configure device enrollment by linking Apple School Manager to your Mobile Device Management (MDM) solution via Settings > Device Management Settings. Assign devices to MDM servers to enable automated enrollment and supervision. For example, if deploying iPads, tie them to your MDM server to push policies and apps seamlessly at activation.
Finally, assign roles and permissions carefully. Use Settings > Roles and Permissions to grant IT staff, educators, and admins appropriate access levels. Avoid over-permissioning: restrict admin roles to IT leads and give educators access only to necessary tools.
- Verify and clean user accounts and classes: 1-2 hours
- Assign Managed Apple IDs: 30-60 minutes
- Link MDM and configure device enrollment: 1-2 hours
- Set roles and permissions: 30 minutes
For example, a district importing 3,000 users typically spends a day verifying data, then a few hours configuring devices and permissions before rollout. The Apple School Manager interface displays user lists and enrollment servers clearly, allowing you to track progress and catch issues early.
How Do You Manage Device Enrollment and Deployment Differences?
Device enrollment in Clever typically involves manual steps or third-party tools to configure devices, lacking deep integration with Apple’s ecosystem. Apple School Manager leverages Automated Device Enrollment (formerly DEP), allowing you to link your Mobile Device Management (MDM) solution directly and streamline out-of-the-box configuration. This means devices are automatically enrolled in your MDM as soon as they connect to the internet, reducing hands-on setup time.
To prepare devices, you assign them in Apple School Manager under Devices > Assign to MDM Server. For example, when a shipment of iPads arrives, you upload their serial numbers or use Apple’s Device Enrollment Program to auto-populate them. You then assign each device to your MDM server, which pushes profiles, apps, and restrictions before a user even opens the device.
This automated workflow impacts the device lifecycle by ensuring consistent configurations, simplifying updates, and enabling remote management. A typical timeline moves from device unboxing to network connection, automatic MDM enrollment, profile installation, and finally classroom readiness—all without manual intervention on each device.
| Step | Clever Device Enrollment | Apple School Manager Device Enrollment |
|---|---|---|
| Device Registration | Manual or third-party import | Automatic via Apple DEP with serial number upload |
| MDM Enrollment | User or IT initiates manually | Automatic upon device activation |
| Profile & App Deployment | Manual or scripted post-enrollment | Automated via linked MDM server |
| Lifecycle Management | Limited remote control | Full remote management, updates, and wipe |
- Upload device serial numbers or use DEP to import devices into Apple School Manager
- Assign devices to your MDM server under Devices > Assign to MDM Server
- Ensure your MDM is properly linked in Apple School Manager settings
- Test a device from unboxing to classroom deployment to verify automated enrollment
- Train support staff on monitoring device status via Apple School Manager and MDM dashboards
What Common Mistakes Should You Avoid During the Migration?
Relying solely on Apple School Manager’s automated data import without thorough manual validation leads to overlooked errors. One district experienced missing student accounts because their Clever export had inconsistent usernames that automated import tools accepted without flagging. Manual cross-checking of user lists against source data caught these discrepancies early, preventing widespread access issues.
Ignoring Managed Apple ID setup causes access failures and user frustration. If you don’t configure Managed Apple ID domains and password policies correctly in Apple School Manager’s Settings > Accounts, students and staff may be unable to sign in to key services. This misstep was a primary cause of helpdesk tickets during a district migration, resolved only after revisiting account setup and reissuing credentials.
Not aligning your Mobile Device Management (MDM) configurations with Apple School Manager settings disrupts device enrollment. For example, if Automated Device Enrollment profiles in your MDM don’t match Apple School Manager’s assigned roles and device groups, devices won’t receive the intended configurations, causing delays in deployment.
Underestimating training needs for IT staff and educators leads to avoidable confusion and errors post-migration. Clear documentation and hands-on sessions on new workflows, especially around Managed Apple IDs and device use, smooth the transition and reduce support calls.
- Manually validate all imported data against original Clever exports before completing import.
- Double-check Managed Apple ID domain and password settings in Apple School Manager.
- Ensure MDM Automated Device Enrollment profiles align precisely with Apple School Manager roles and groups.
- Plan and deliver targeted training for IT and educators on new processes and tools.
How Can You Ensure a Smooth Transition for Educators and Students?
Clear communication and targeted training are essential to minimize disruption. Develop quick-reference guides that focus on Apple School Manager workflows, such as accessing Managed Apple IDs via the Apple School Manager portal and understanding device assignment through the Automated Device Enrollment section. Provide step-by-step instructions on common tasks like resetting passwords or locating class rosters.

Set up dedicated support channels, such as a help desk email or phone line staffed during peak hours, to address immediate issues. For example, having a support team ready to troubleshoot login problems during the first week can prevent frustration and downtime.
Schedule training sessions that highlight differences educators and students will encounter daily. A typical agenda might begin with logging into Managed Apple IDs, followed by managing class lists, and concluding with device usage scenarios tied to Apple School Manager features. Gather feedback through surveys after training and migration phases to identify pain points and adapt your support materials accordingly.
- Create user guides tailored to Apple School Manager tasks
- Establish accessible, responsive support channels
- Conduct focused training sessions on daily workflows
- Collect and act on user feedback post-migration
Frequently asked questions
Can I run Clever and Apple School Manager simultaneously during the transition?
Yes, you can operate both systems concurrently to ensure continuity. Maintain Clever for roster updates and app integrations while setting up Apple School Manager to synchronize your data. However, plan to phase out Clever promptly to avoid conflicting user identities and duplicated device enrollments.
What happens to existing Clever-integrated apps after moving to Apple School Manager?
Apps integrated through Clever will not automatically transfer to Apple School Manager. You must reassign or repurchase app licenses within Apple School Manager’s App Store and reconfigure deployment through your MDM. Prepare for a transition period where some apps may require manual reassignment or temporary parallel management.
How do Managed Apple IDs differ from regular Apple IDs for students and staff?
Managed Apple IDs are created and controlled by your organization via Apple School Manager, enabling centralized management of accounts, restrictions, and permissions. Unlike regular Apple IDs, they do not allow purchases from the public App Store and are designed specifically for educational use with enhanced privacy and security controls.
What MDM solutions work best with Apple School Manager device enrollment?
Most leading MDM providers support Apple School Manager’s Automated Device Enrollment, including Jamf Pro, Mosyle, Cisco Meraki, and VMware Workspace ONE. Choose an MDM that integrates tightly with Apple’s Device Enrollment Program (DEP) to automate configuration profiles, supervision, and app deployment for a seamless device onboarding experience.
This checklist does not cover migrations involving additional identity providers or integrations beyond Clever and Apple School Manager.
If your district uses federated login systems other than Clever, or if you have third-party rostering integrations, this guide won’t cover those complexities. In such cases, coordinate with your identity provider and Apple support before proceeding. Also, large-scale device deployments requiring Mobile Device Management (MDM) customizations beyond standard Apple School Manager features may need specialized planning.
Quick checklist
- Confirm all user identities and rostering data in Clever are current and accurate before export.
- Export CSV files directly from Clever’s rostering dashboard; verify formatting matches Apple School Manager requirements.
- In Apple School Manager, complete the Domain Verification under Settings > Organization to enable rostering.
- Import rostering data via Apple School Manager’s People > Rosters section, resolving any import errors promptly.
- Set up Automated Device Enrollment in Apple School Manager and assign devices to your MDM server.
- Reconfigure device profiles in your MDM console to align with Apple School Manager enrollment workflows.
- Communicate changes clearly to educators and students, providing updated login instructions and support contacts.
Start by verifying your Clever roster export matches Apple School Manager’s import template exactly. This step prevents the most common and disruptive errors. Ensuring your data is clean and correctly formatted upfront saves hours of troubleshooting later and keeps your migration on track.
See also: How to Build a Clever Implementation Timeline That Works · Apple School Manager Rollout Plan for Private Schools: A Practical Guide · Apple School Manager Implementation Timeline: Step-by-Step Guide for Education IT Leaders · Switching from Apple School Manager to Clever: A Clear How-To Guide