Switching from Screencastify to Google Sites: Your Expert Guide
Discover how to centralize and organize your videos by switching from Screencastify to Google Sites with this expert step-by-step guide.

Short answer: Switching from Screencastify to Google Sites lets you centralize your video content in a customizable website, making organization and sharing more effective. You download your Screencastify videos, then embed or upload them into Google Sites, where you control layout, access, and presentation.
This guide covers key steps in switching from Screencastify to Google Sites, focusing on downloading your videos, preparing them for upload, and setting up Google Sites to host and organize your content. You’ll also learn how to remove Screencastify from your browser and manage your Screencastify account after the transition. Whether you’re an educator or content creator, this expert guide helps you maintain video accessibility and improve user experience during and after the switch.
Understand Why You Might Switch from Screencastify to Google Sites
Screencastify specializes in capturing and editing videos directly within your browser, making it ideal for quick screen recordings and immediate content creation. However, it lacks robust tools for organizing and presenting videos within a broader content framework. Google Sites, by contrast, is designed for building comprehensive websites that can host and structure a variety of content types—including videos—into well-organized pages accessible to your audience.
Consider a teacher who has recorded multiple lesson videos with Screencastify. Instead of sharing links individually, consolidating these videos on a Google Sites page allows students to easily navigate topics, access supplementary materials, and view content in a centralized location. This improves accessibility and streamlines communication.
Google Sites also integrates seamlessly with Google Workspace apps such as Google Drive, Docs, and Calendar, allowing you to embed supplementary resources alongside your videos and maintain a unified workflow within the Google ecosystem.
| Feature | Screencastify | Google Sites |
|---|---|---|
| Primary Function | Screen recording and video editing | Content hosting and website creation |
| Video Editing | Basic trimming and annotations | None (relies on uploaded content) |
| Content Organization | Limited to video library | Pages, sections, embedded multimedia |
| Sharing | Video links and direct uploads | Public or restricted site access with embedded videos |
| Integration | Google Drive export and sharing | Full Google Workspace integration (Drive, Docs, Calendar) |
How to Download Videos from Screencastify for Use on Google Sites
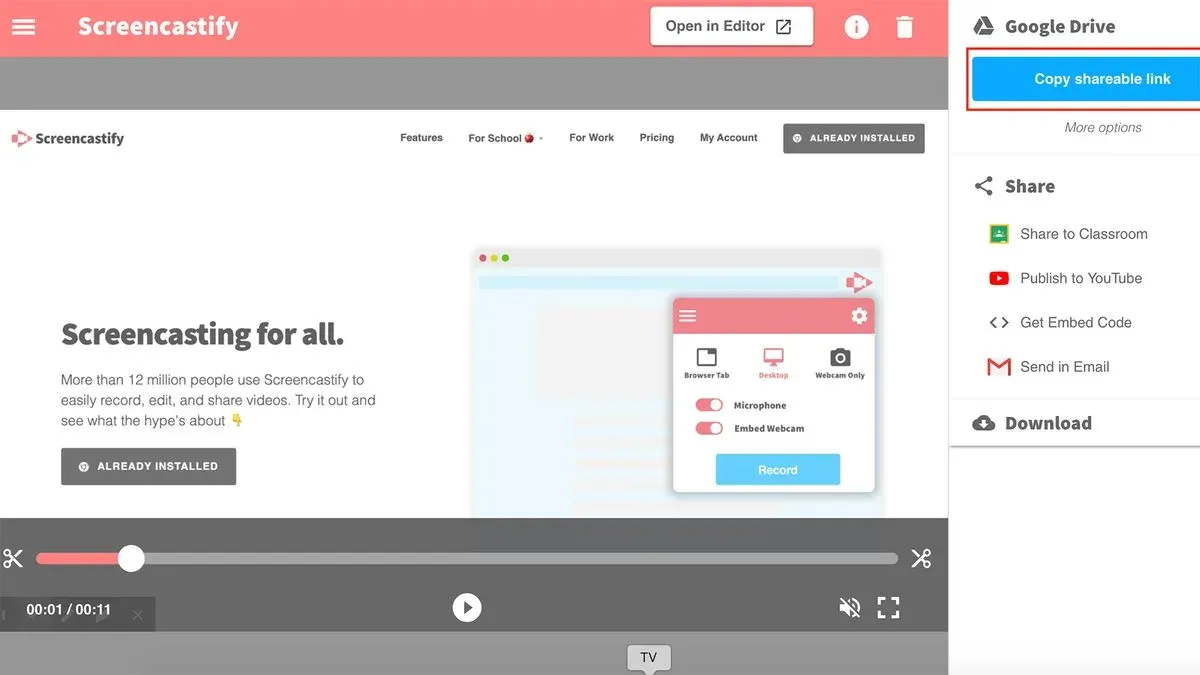
Begin by accessing your Screencastify dashboard from the Chrome extension icon or directly via the Screencastify website. Your recorded videos are listed here with thumbnails and titles for easy identification.
To download a video, click the three-dot menu next to the video title and select Download. Screencastify typically exports files as MP4, compatible with Google Sites. Choose the highest resolution available to maintain video quality, especially if your content includes detailed visuals or text.
Downloaded files usually range between 20MB and 200MB depending on length and resolution. For example, a 10-minute tutorial at 720p will be roughly 50MB. Save your videos in a dedicated folder named clearly, such as Screencastify Exports, to streamline your upload process later.
Organize files with consistent naming conventions that reflect the content, like Lesson1_Introduction.mp4, to easily locate them within your Google Sites project. This preparation reduces confusion during site building and ensures efficient content management.
- Open Screencastify dashboard from the Chrome extension or website
- Locate the desired video and click the three-dot menu
- Select Download and choose the highest available resolution
- Save videos as MP4 in a clearly named folder
- Use descriptive, consistent file names for easy identification
How to Use Google Sites to Host and Organize Your Screencastify Videos
Start by creating a new Google Site or opening an existing one via sites.google.com. To embed your Screencastify videos, upload the MP4 files to Google Drive if not already there. In the Site editor, choose the page where you want to add videos, then click "Insert" > "Drive" to select videos directly from your Drive. This embeds the video with playback controls, keeping your site lightweight and responsive.
Organize your content by using pages and subpages—dedicate each page to a topic or lesson. For example, a science teacher might create main pages for "Experiments" and "Lectures," with subpages hosting individual video recordings. Use the navigation menu settings to enable either a horizontal top menu or a collapsible side menu, depending on your audience’s preference.
Leverage Google Sites’ layout options like sections with text alongside videos to provide context or instructions. Customize headers and footers to maintain branding and add links to related resources. This structure transforms raw Screencastify recordings into an accessible, well-organized learning hub.
- Create or select a Google Site at sites.google.com
- Upload videos to Google Drive if needed
- Embed videos using Insert > Drive
- Organize videos into pages and subpages
- Customize navigation and layout for clarity
How to Remove Screencastify from Your Browser
Before removing Screencastify, ensure you have backed up all your important videos and data. Once you confirm your content is safely stored, you can proceed with uninstalling the extension.
Removing Screencastify from Chrome
Open Chrome and click the three-dot menu at the top-right corner. Navigate to More tools > Extensions. Find Screencastify in the list. Click the Remove button next to it, then confirm by selecting Remove again in the pop-up. This fully deletes the extension from your browser.
For a visual example, imagine opening your Chrome extensions page where every installed extension is listed with a small card. Screencastify’s card has a red trash bin icon labeled "Remove". Clicking this and confirming clears it off your browser.
Removing Screencastify from Edge
In Microsoft Edge, click the three-dot menu at the top-right, then select Extensions. Find Screencastify under your installed extensions. Click Remove and confirm the action. This ensures the add-on is completely uninstalled.
After removal in either browser, restart the browser and verify Screencastify no longer appears in your extensions list or toolbar. This confirms the process is complete.
- Back up Screencastify data before removal
- Go to Chrome's or Edge's extensions page
- Click Remove next to Screencastify
- Confirm the removal prompt
- Restart the browser and check the extension is gone
How to Edit Screencastify Videos Before Uploading to Google Sites
Screencastify offers a straightforward editing suite accessible via the “My Videos” dashboard. Start by selecting the video you want to refine, then click “Edit Video.” Here, you can trim unwanted footage by dragging the start and end sliders precisely to remove distractions or pauses.
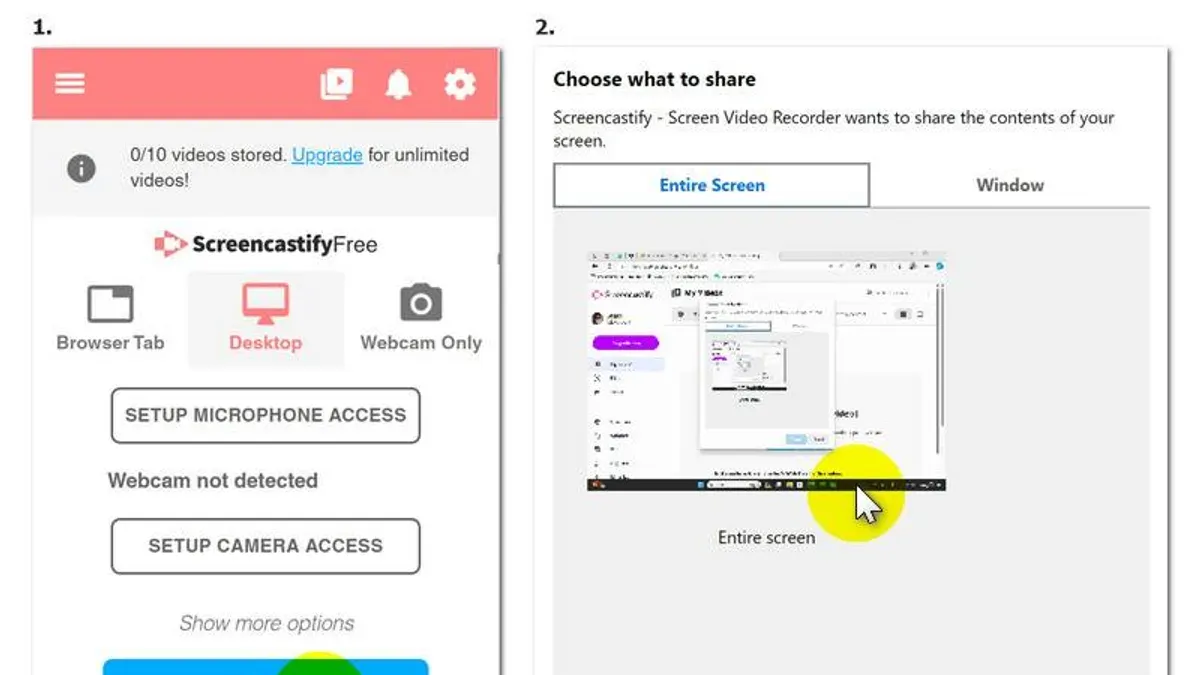
Use the annotation tools to add text boxes, arrows, or highlights that emphasize key points, improving viewer focus. For sensitive content, apply the blur effect by selecting the "Blur" tool and drawing over areas like passwords or personal data, ensuring privacy compliance.
After editing, export your video by clicking “Save” and choosing the high-quality MP4 format. This step ensures compatibility and smooth playback when embedding in Google Sites.
For example, trimming a 10-minute tutorial down to 8 minutes by removing initial setup delays and adding annotations to highlight steps can significantly boost engagement. Viewers find the content clearer and more compelling, reducing drop-off rates.
How to Cancel Screencastify and Manage Your Account
To avoid ongoing charges after switching, you must cancel your paid Screencastify subscription through your account settings. Begin by logging into your Screencastify account and navigating to the Account Settings area, typically accessible via the profile icon at the top-right corner.
Within Account Settings, locate the Billing or Subscription tab. Here, you will see your current plan details and payment information. Click the Cancel Subscription button to initiate the cancellation process.
Follow the on-screen prompts to confirm your cancellation. Screencastify usually asks for a cancellation reason and provides a confirmation screen once complete. For example, after clicking cancel, you might see a confirmation message like "Your subscription will remain active until the end of the current billing cycle." This means your paid features continue until then.
After cancellation, your Screencastify account remains active with access to your videos, but your subscription features will revert to the free plan limits. Videos you previously created remain stored within your account, but advanced editing or unlimited recording capabilities will no longer be available.
Checklist:
- Log in and go to Account Settings
- Open the Billing or Subscription tab
- Click Cancel Subscription
- Follow prompts and confirm cancellation
- Note your subscription end date and account status
Read next
- Moving from Screencastify to Canva for Education: Your Essential Checklist
- Switching from Screencastify to Adobe Express: Your Expert Guide
- Switching from Screencastify to Book Creator: Your Expert Guide
- Master Your Google Sites Implementation Timeline: A Clear Step-by-Step Guide
Frequently asked questions
How to download from screencastify?
To download videos from Screencastify, open your Screencastify extension and navigate to the video you want. Click the three-dot menu next to the video, then select "Download". The video will save as an MP4 file to your default downloads folder.
How to edit in screencastify?
Screencastify offers a simple built-in editor that lets you trim the beginning and end of recordings. After recording, click "Edit Video" in the Screencastify dashboard. Use the trim handles to adjust the video length, then save your changes before exporting.
How to use screencastify?
Start by installing the Screencastify browser extension. Click the extension icon to select recording options like screen, webcam, or tab. After recording, you can preview, edit, and share your video directly via links or downloads.
How to download screencastify videos?
Access your Screencastify Library by clicking the extension icon and selecting "My Videos." Find the video, click the three-dot menu, and choose "Download." This saves the file locally as an MP4 for easy use outside Screencastify.
how to download screencastify videos
Downloading Screencastify videos involves opening the Screencastify menu, locating your saved recordings, and selecting the download option from the video’s settings menu. Ensure you have the necessary permissions if videos are shared within a team.
Limitations to Keep in Mind
This guide does not cover advanced video editing beyond Screencastify’s native trimming and annotation tools; if you require professional-grade editing, consider dedicated software like Adobe Premiere Pro or DaVinci Resolve. Google Sites excels at hosting and organizing your video content but does not offer native video recording or advanced editing features, so plan your workflow accordingly.
Quick checklist
- Download all necessary Screencastify videos in MP4 format via the Screencastify dashboard.
- Edit videos using Screencastify’s built-in tools or external software before uploading.
- Create a dedicated page or section in Google Sites to organize your video content logically.
- Embed videos using the Google Sites Insert menu by selecting "From Drive" and choosing the uploaded files.
- Remove the Screencastify extension from your browser once migration is complete to avoid confusion.
- Cancel your Screencastify subscription or account if you no longer need it to avoid unwanted charges.
The most valuable next step is to start building your Google Sites page with a clear structure for your videos and resources. This ensures your audience can easily navigate and engage with your content, making the transition from Screencastify seamless and effective.